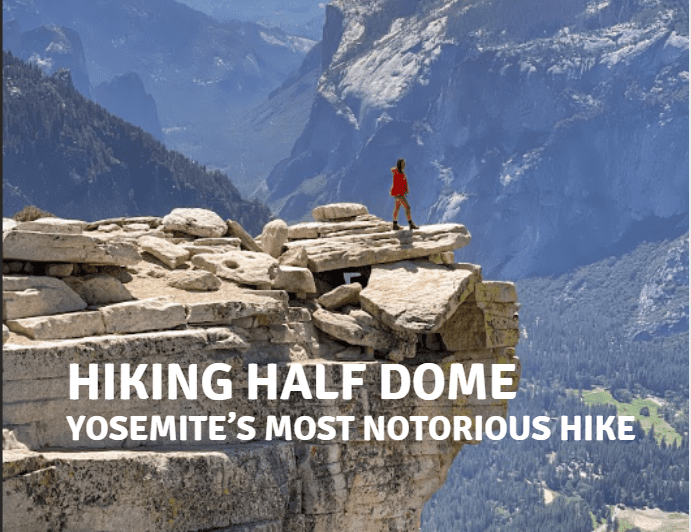
I’ll never forget the feeling of my sweaty hands gripping heavy metal cables while I followed a line of people 8,000 feet in the air – hiking Half Dome should be on everyone’s bucket list. I have somehow been lucky enough to climb it three times and each was a different experience. With the cables up, with the cables down, day hiking, backpacking, and in different months of the year. So here is everything you need to know about hiking Half Dome.
Quick Stats for Hiking Half Dome
Distance: 16.4 miles RT
Elevation Gain: 4800 ft.
Estimated Time: 11-14 hours
Getting the Half Dome Permit
A lot of people think there is only one way to get a permit. This isn’t true. There are several ways to get a permit for hiking Half Dome and I will cover them here:
- ) Apply for the Preseason lottery. The application period is from March 1st – March 31st EST. For the preseason lottery, you can apply for up to 6 people.
- ) Daily Lottery: There are additional permits every day during the hiking season. You need to apply for these 2 days prior to your hiking date.
- ) Don’t tell anyone I told you this, but you can add it on easily to a backpacking permit.
Hiking Half Dome
Now for the exciting part, the actual Half Dome hike. Unless you are backpacking to Half Dome, you will be hiking to Half Dome on the Mist Trail and starting at the Happy Isles Trailhead. My advice here is to start as early as possible. The first time I hiked Half Dome, I started in the dark with a headlamp at 5am. I’ve also done it at 8am with no problem, but the goal here is to avoid crowds and get to the dome before the afternoon. There are frequently storms in the afternoon so I try to avoid summiting around that time for a reason. And of course, you want to avoid coming down in the dark. The hike is around 16 miles roundtrip with a whopping 4,800 ft. of elevation gain. In other words, your legs will feel like noodles after.
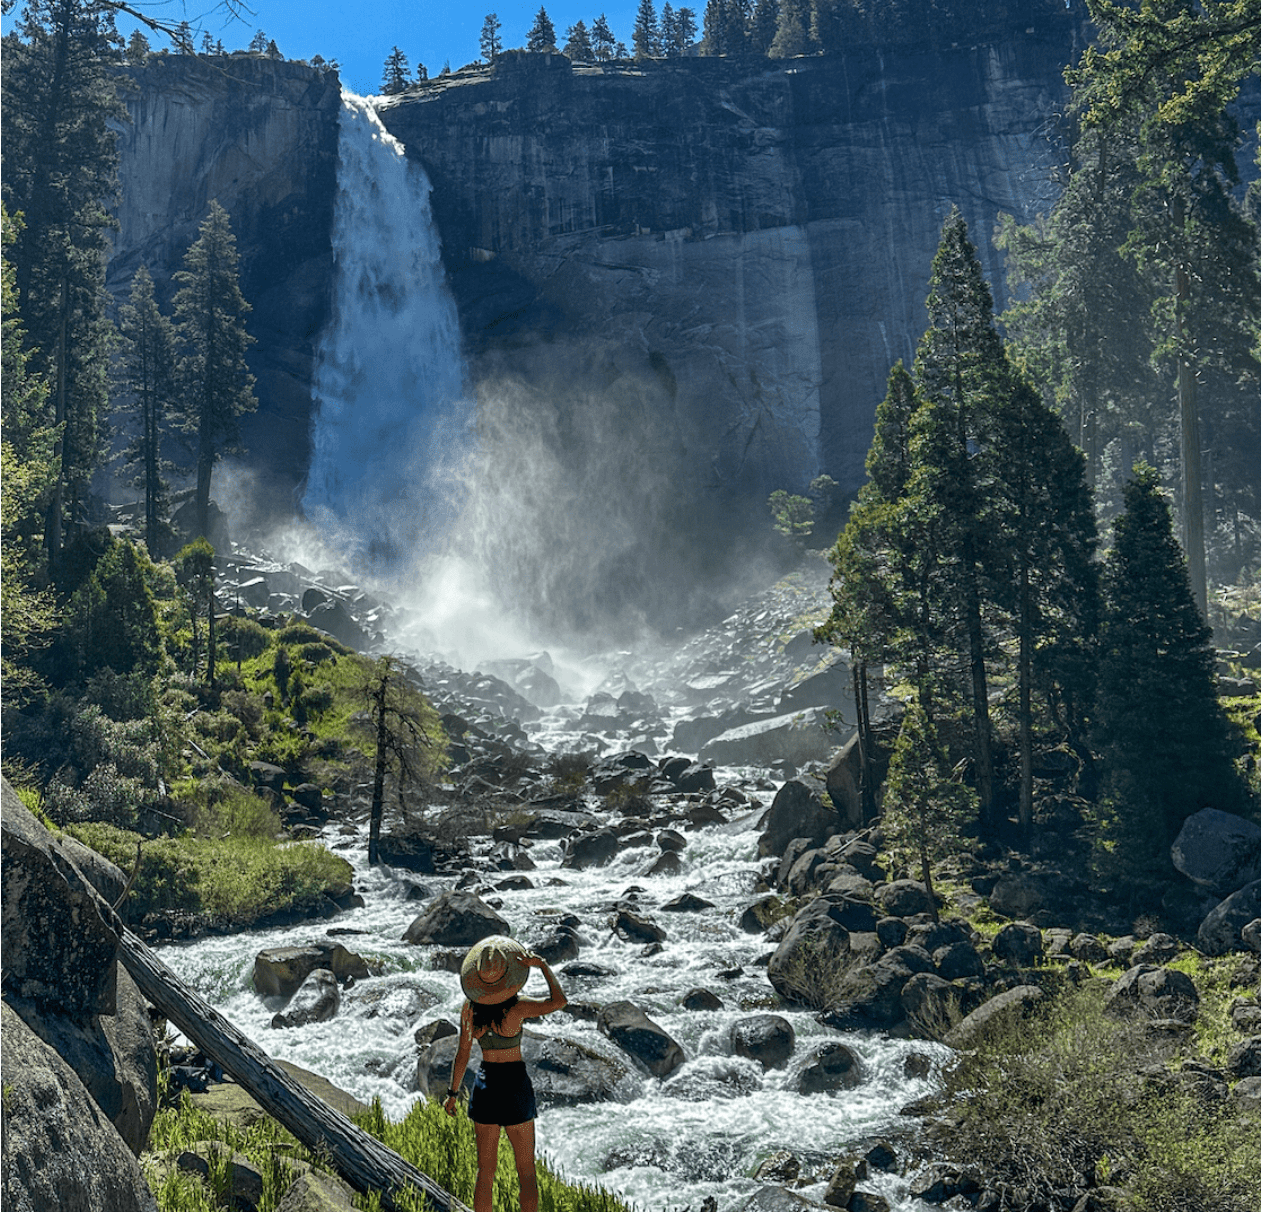
The trail starts out with a steady incline through the woods until you reach the bridge before Vernal Falls about 2 miles in. Vernal is one of my favorite waterfalls in the park and it can be pretty powerful depending on the season. You should prepare to get a little wet here (which feels good when your hiking). You should also be careful of the stone stairway, it could get slippery.
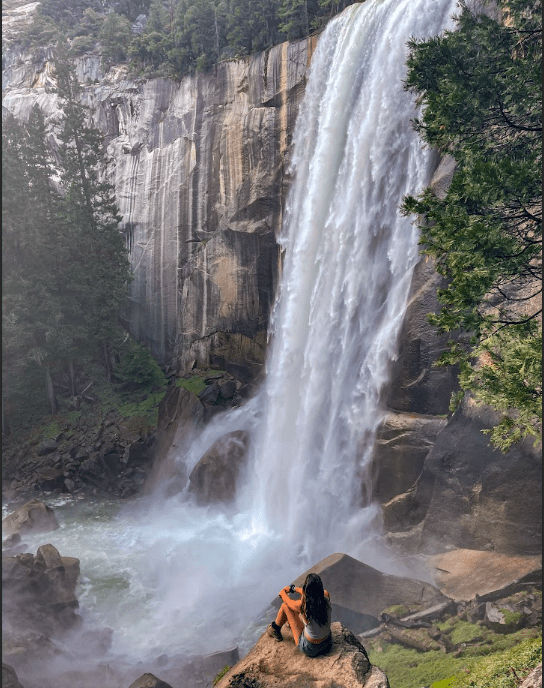
It’s a strenuous climb to the top of Vernal fall. At this point you are gaining about 1000ft. Then it’s onto Nevada falls, which is another beautiful fall and an equally treacherous set of switchbacks. Nonetheless, I think this is the most beautiful area of the park and it’s one of my favorite parts about hiking Half Dome.
At the top of Nevada Falls, you will hit the 5.4 mile mark. It’s usually around this time that I whip out a sandwich or a snack to prepare for the next uphill battle. The trail plains off for a bit, making this the only easy section of trail until Little Yosemite Valley. Little Yosemite is a small campsite for backpackers (if you do have a backpacking permit then you can spend the night here). There’s also a river that runs near the campground if you need water.
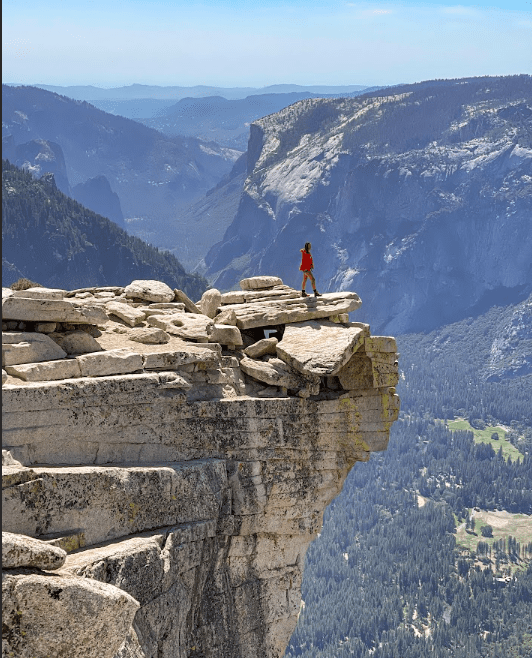
A steady incline through the sequoias finally take’s you to your first view of the Subdome. A steep hike up the subdome and some granite switchbacks will finally bring you face to face with the Half Dome cables. And hopefully, if you started hiking Half Dome early enough, not too many people have arrived yet.
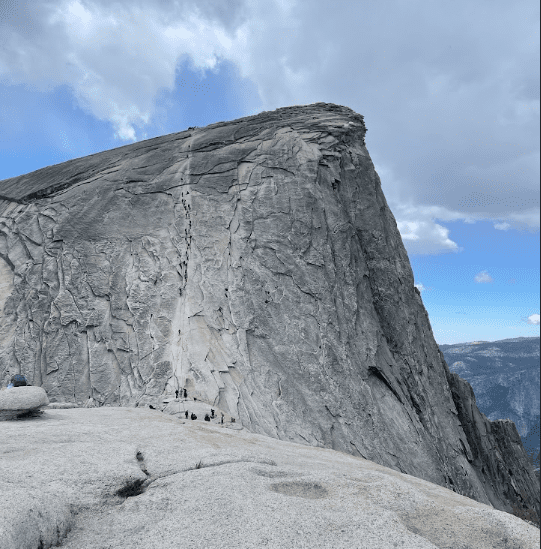
Most people hike Half Dome when the cables are up – meaning they are attached to the top of metal poles (think the shape of a velvet rope). The cables are typically put up on the Friday before Memorial Day and are taken down after the second Monday in October. You also have the choice of going in the off season when the cable are down (meaning they lay flat on the rock). It is way easier to go when they are up. If they are down you will need a harness to tie in with a prusik knot.
The climb to the top is demanding, mostly because you are clenching onto a cable 8,000 ft in the air with a bunch of strangers. There are wood planks to step on to keep you from slipping on the granite, but there is always at least one person coming down who get’s nervous and decides not to move…which of course makes it difficult for everyone else behind them. For this reason, I’m a bit careful about who I decide to follow onto the cables and usually look for a window where it’s not too crowded.
Most people also wear gloves on the cables. You’ll notice in my pictures I usually don’t. I feel like the gloves I’ve tried using in the past have made it more slippery, but I do get blisters on my hands from doing it this way.
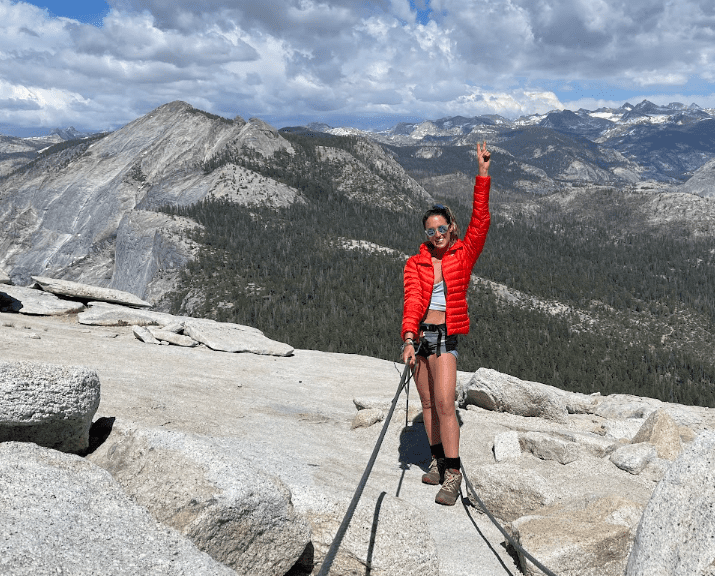
Just take your time and you will be okay. It usually takes 20-30 minutes to reach the top of Half Dome. And it is glorious.
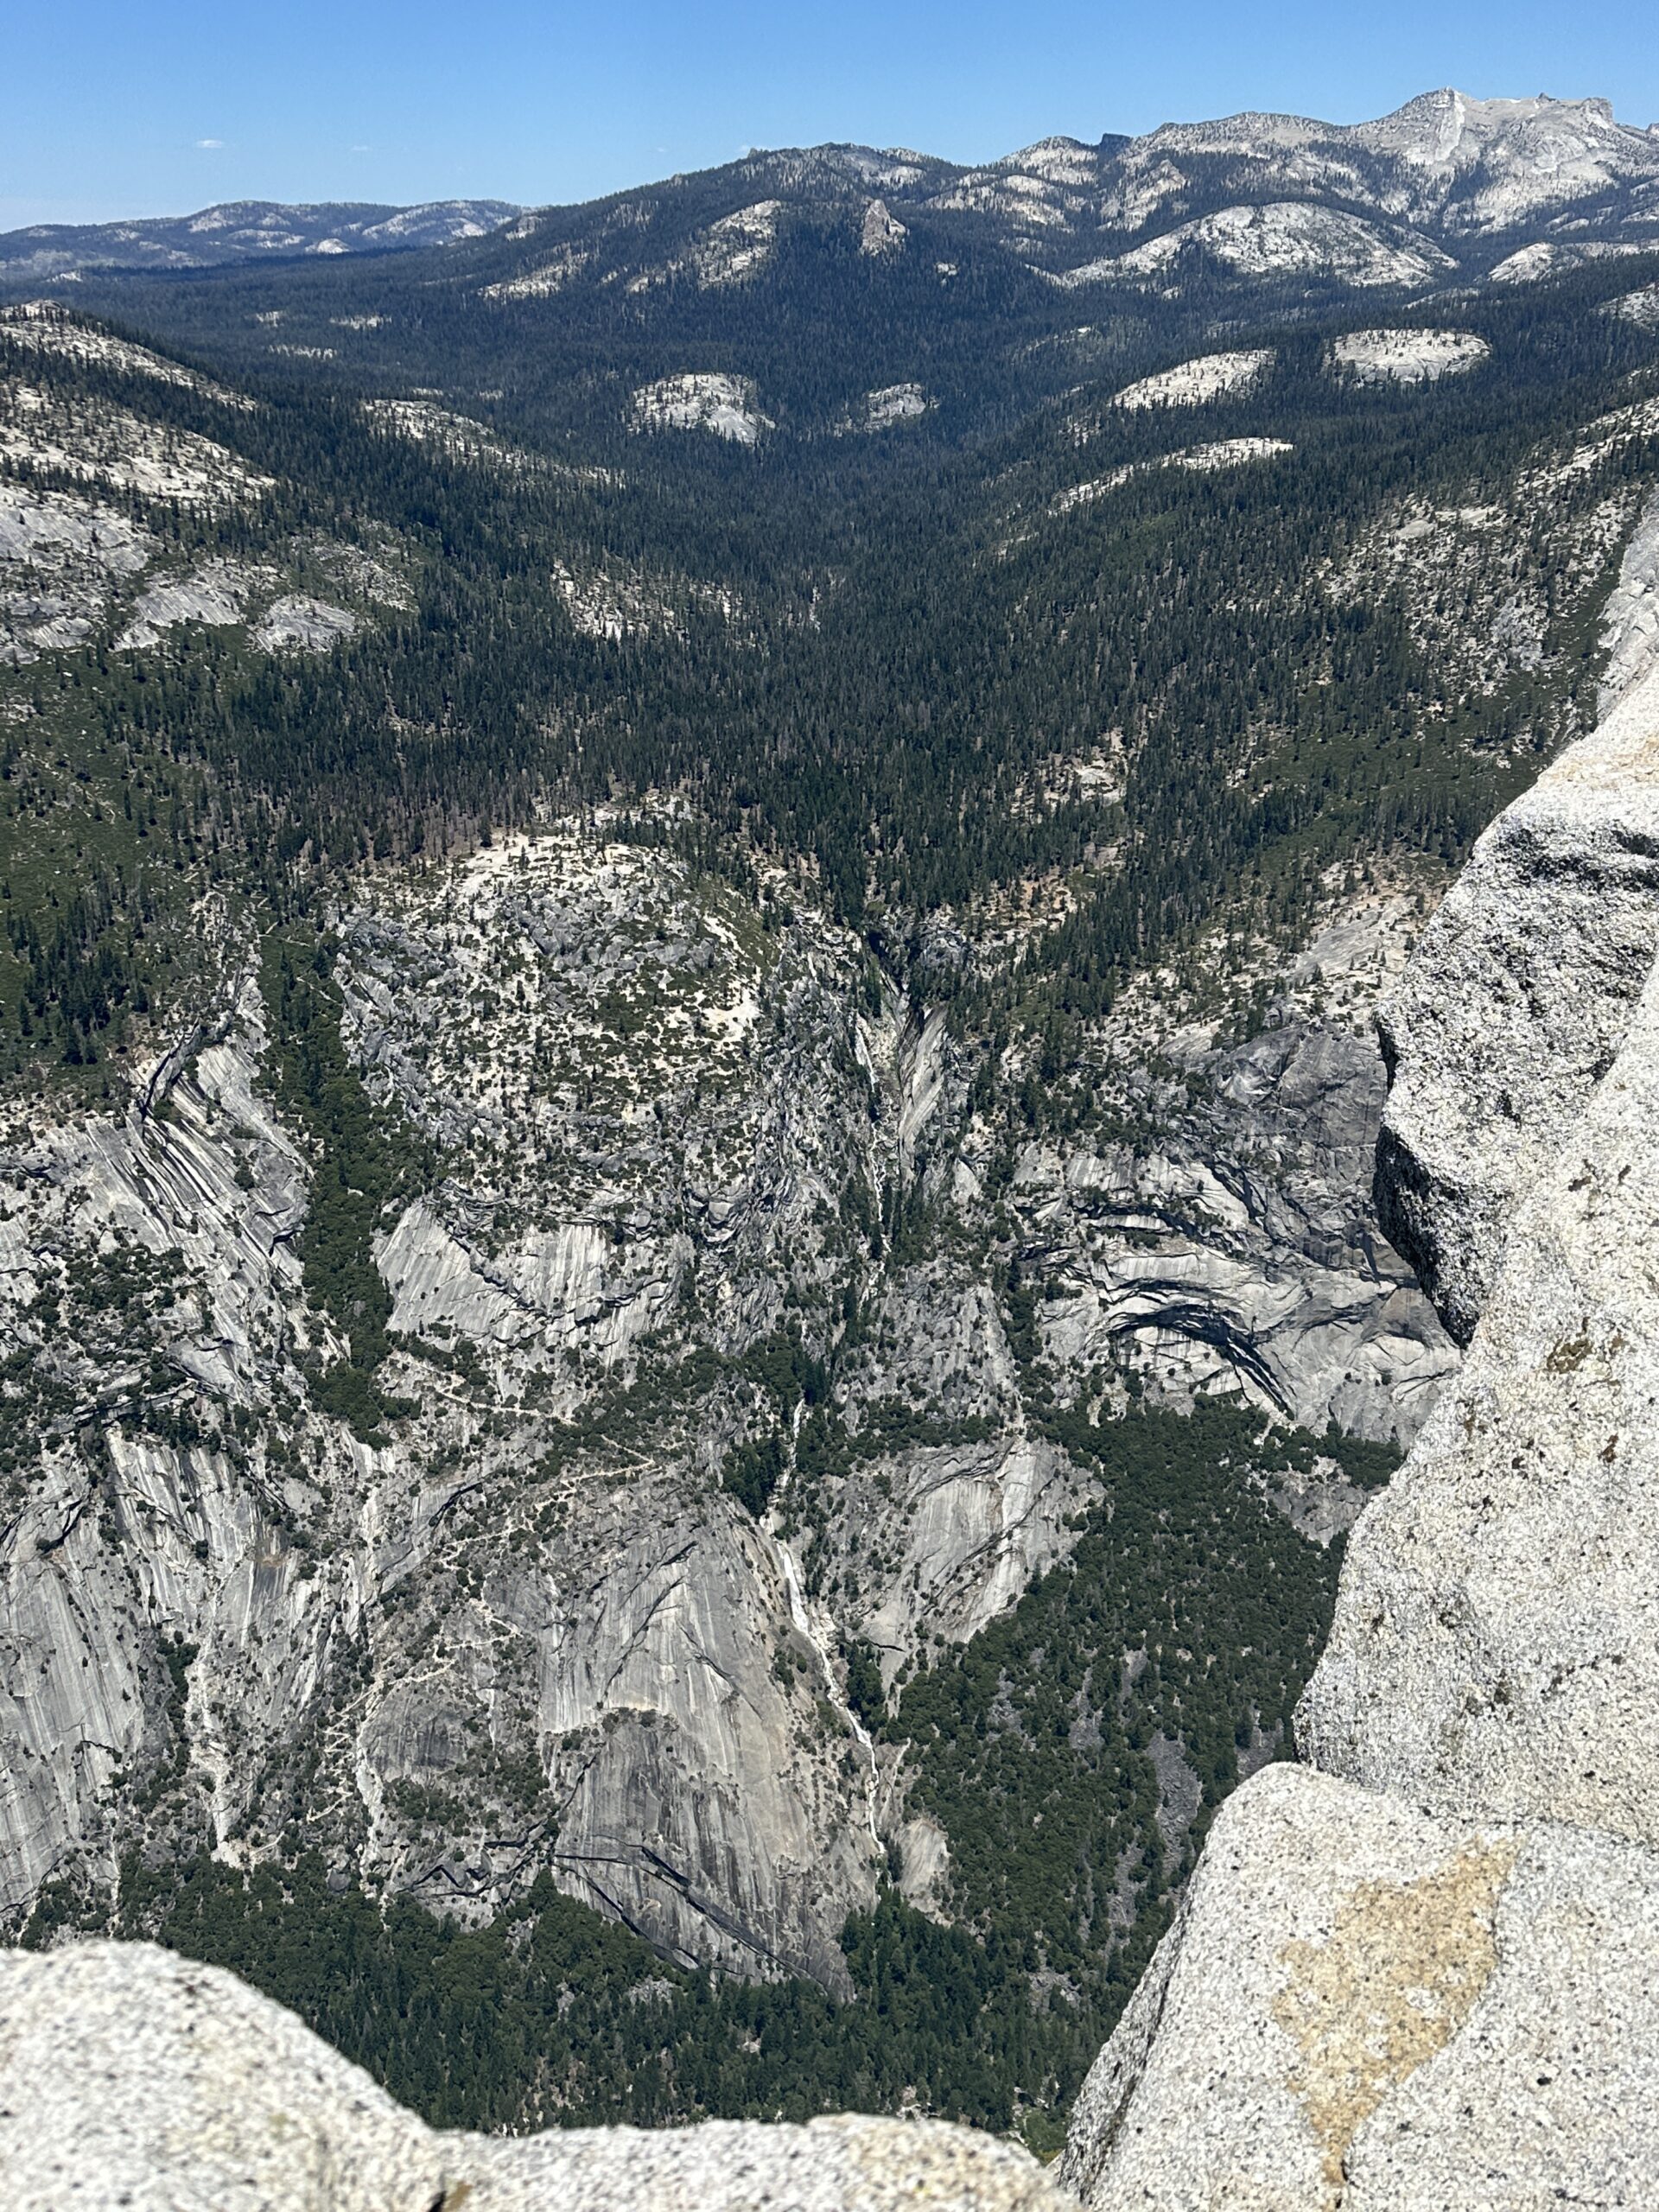
On the Half Dome Summit, there is a 360 view of the park. Yosemite falls looks like a tiny trickle of water down below and everyone is taking photos on a rock pile called the diving board.
And just like that, you have to do the whole thing in reverse. I find it easier going down the cables backwards (like a ladder).
On the way back, take some time to grab some photos of the falls. Unless of course you have backpacking permits, then you are lucky enough to spend a night in Little Yosemite, jump in the river and make some friends. 🙂
Do you have any questions about hiking Half Dome? Feel free to comment below.
and if you are looking for other hikes in Yosemite, check out my post on the best hikes in Yosemite.
or if you need somewhere to stay, here are tips on the best places to stay near Yosemite National Park 🙂