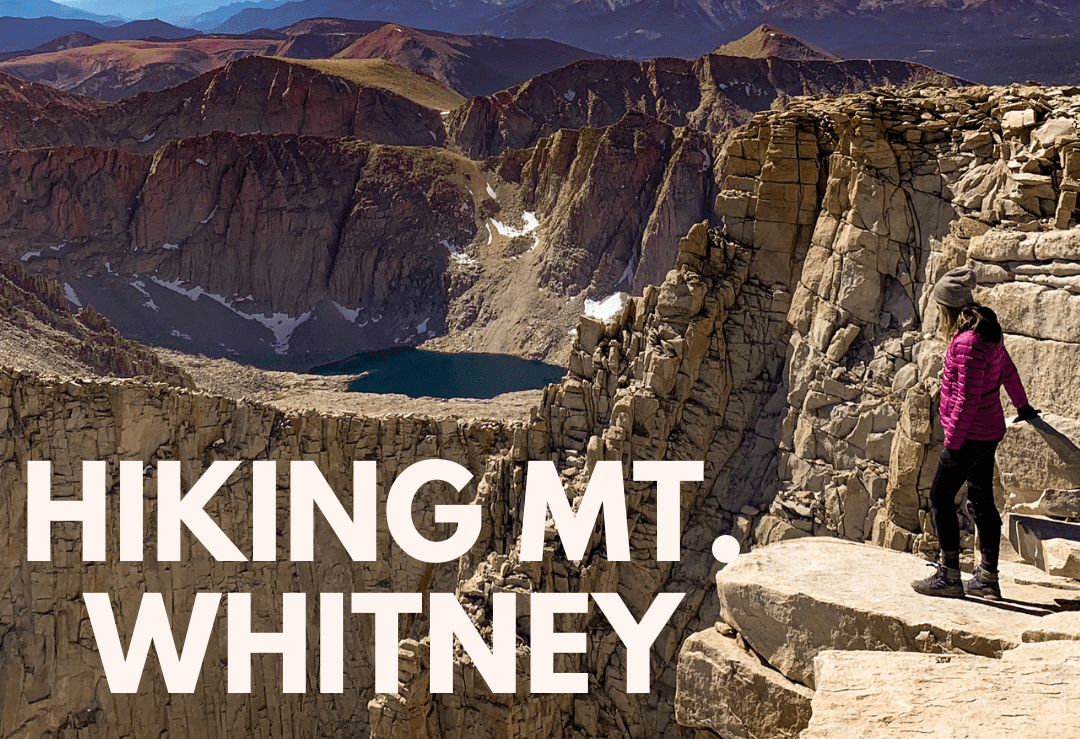
I consider myself a pretty avid hiker, so when my friends asked if I was interested in hiking Mount Whitney, I didn’t even hesitate. Standing at 14,505 ft., Whitney is the highest mountain in the contiguous US (not counting Alaska). Although Mount Whitney towers over all other mountains in the Sierras, the hike to the summit doesn’t require any special mountaineering skills. This means that as long as you can secure a permit, train your body for long hikes and high altitude and can withstand freezing nights, you can hike Mount Whitney.
Mount Whitney Hike Stats
Distance: 22 miles
Hike Time: 12-16 hours in one day or a 2 day hike
Total Elevation Gain: 6,960 feet
Highest Elevation:14,505 feet
Hiking Mount Whitney As a Day Hike Vs. Overnight Hike
Before getting a permit to hike Mount Whitney, you will need to choose whether you’ll be hiking Mount Whitney in a day or in two days. A day hike means that you will be hiking for the entire day, but on the positive side you won’t need to carry all of your heavy belongings (food for two days, tent, sleeping bag, etc.). Alternatively, hiking Whitney in two days means that you have less mileage to cover each day, but you will also have to carry a heavy pack up the first 6 miles.
We opted for the latter. Splitting the hike into two days also gives you more time to acclimate to the altitude, which was what I was most worried about. I also thought it would be fun to camp one night backcountry (laughing at this now thinking of me freezing in my tent).
Hiking Mount Whitney in 2 Days
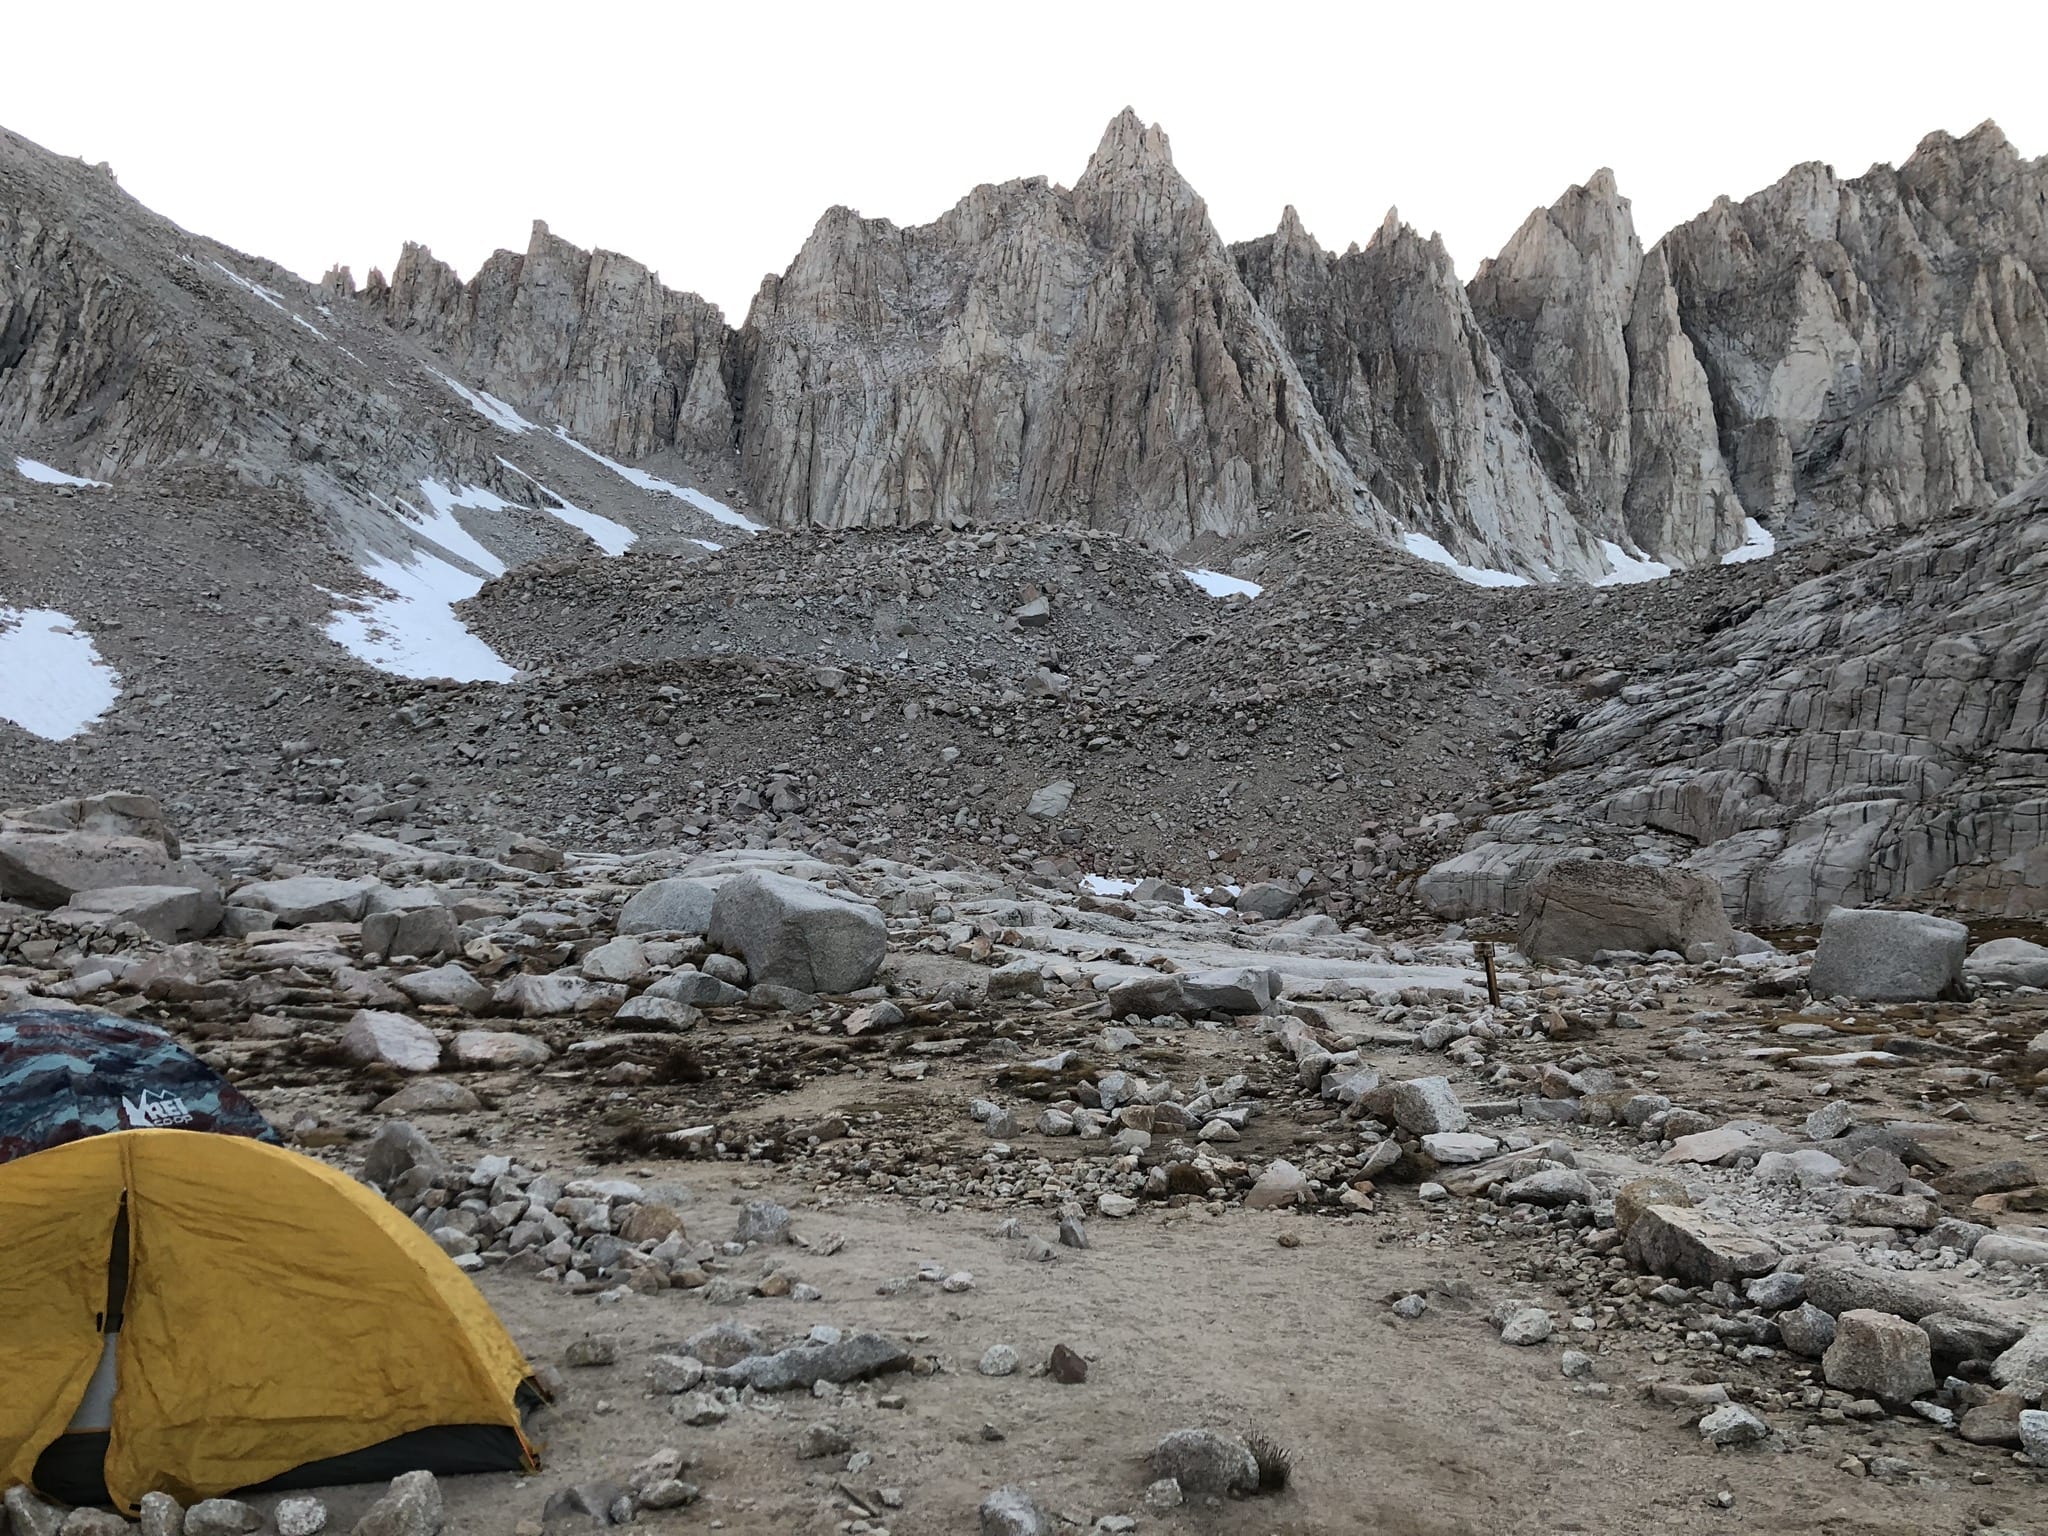
If you will be hiking Mount Whitney in two days, the most popular place to camp is trail camp at 12,000 ft. It’s 6 miles from the trailhead, so that will be the distance you have to carry your pack. If there’s no space at Trail Camp or you can’t make it there the first day of the hike, you also have these options: Consultation Lake (near Trail Camp), Outpost Camp (3.8 miles on the trail, 10400 feet), or Lone Pine Lake* (2.8 miles, 9900 feet).
If you decide to camp, also know that:
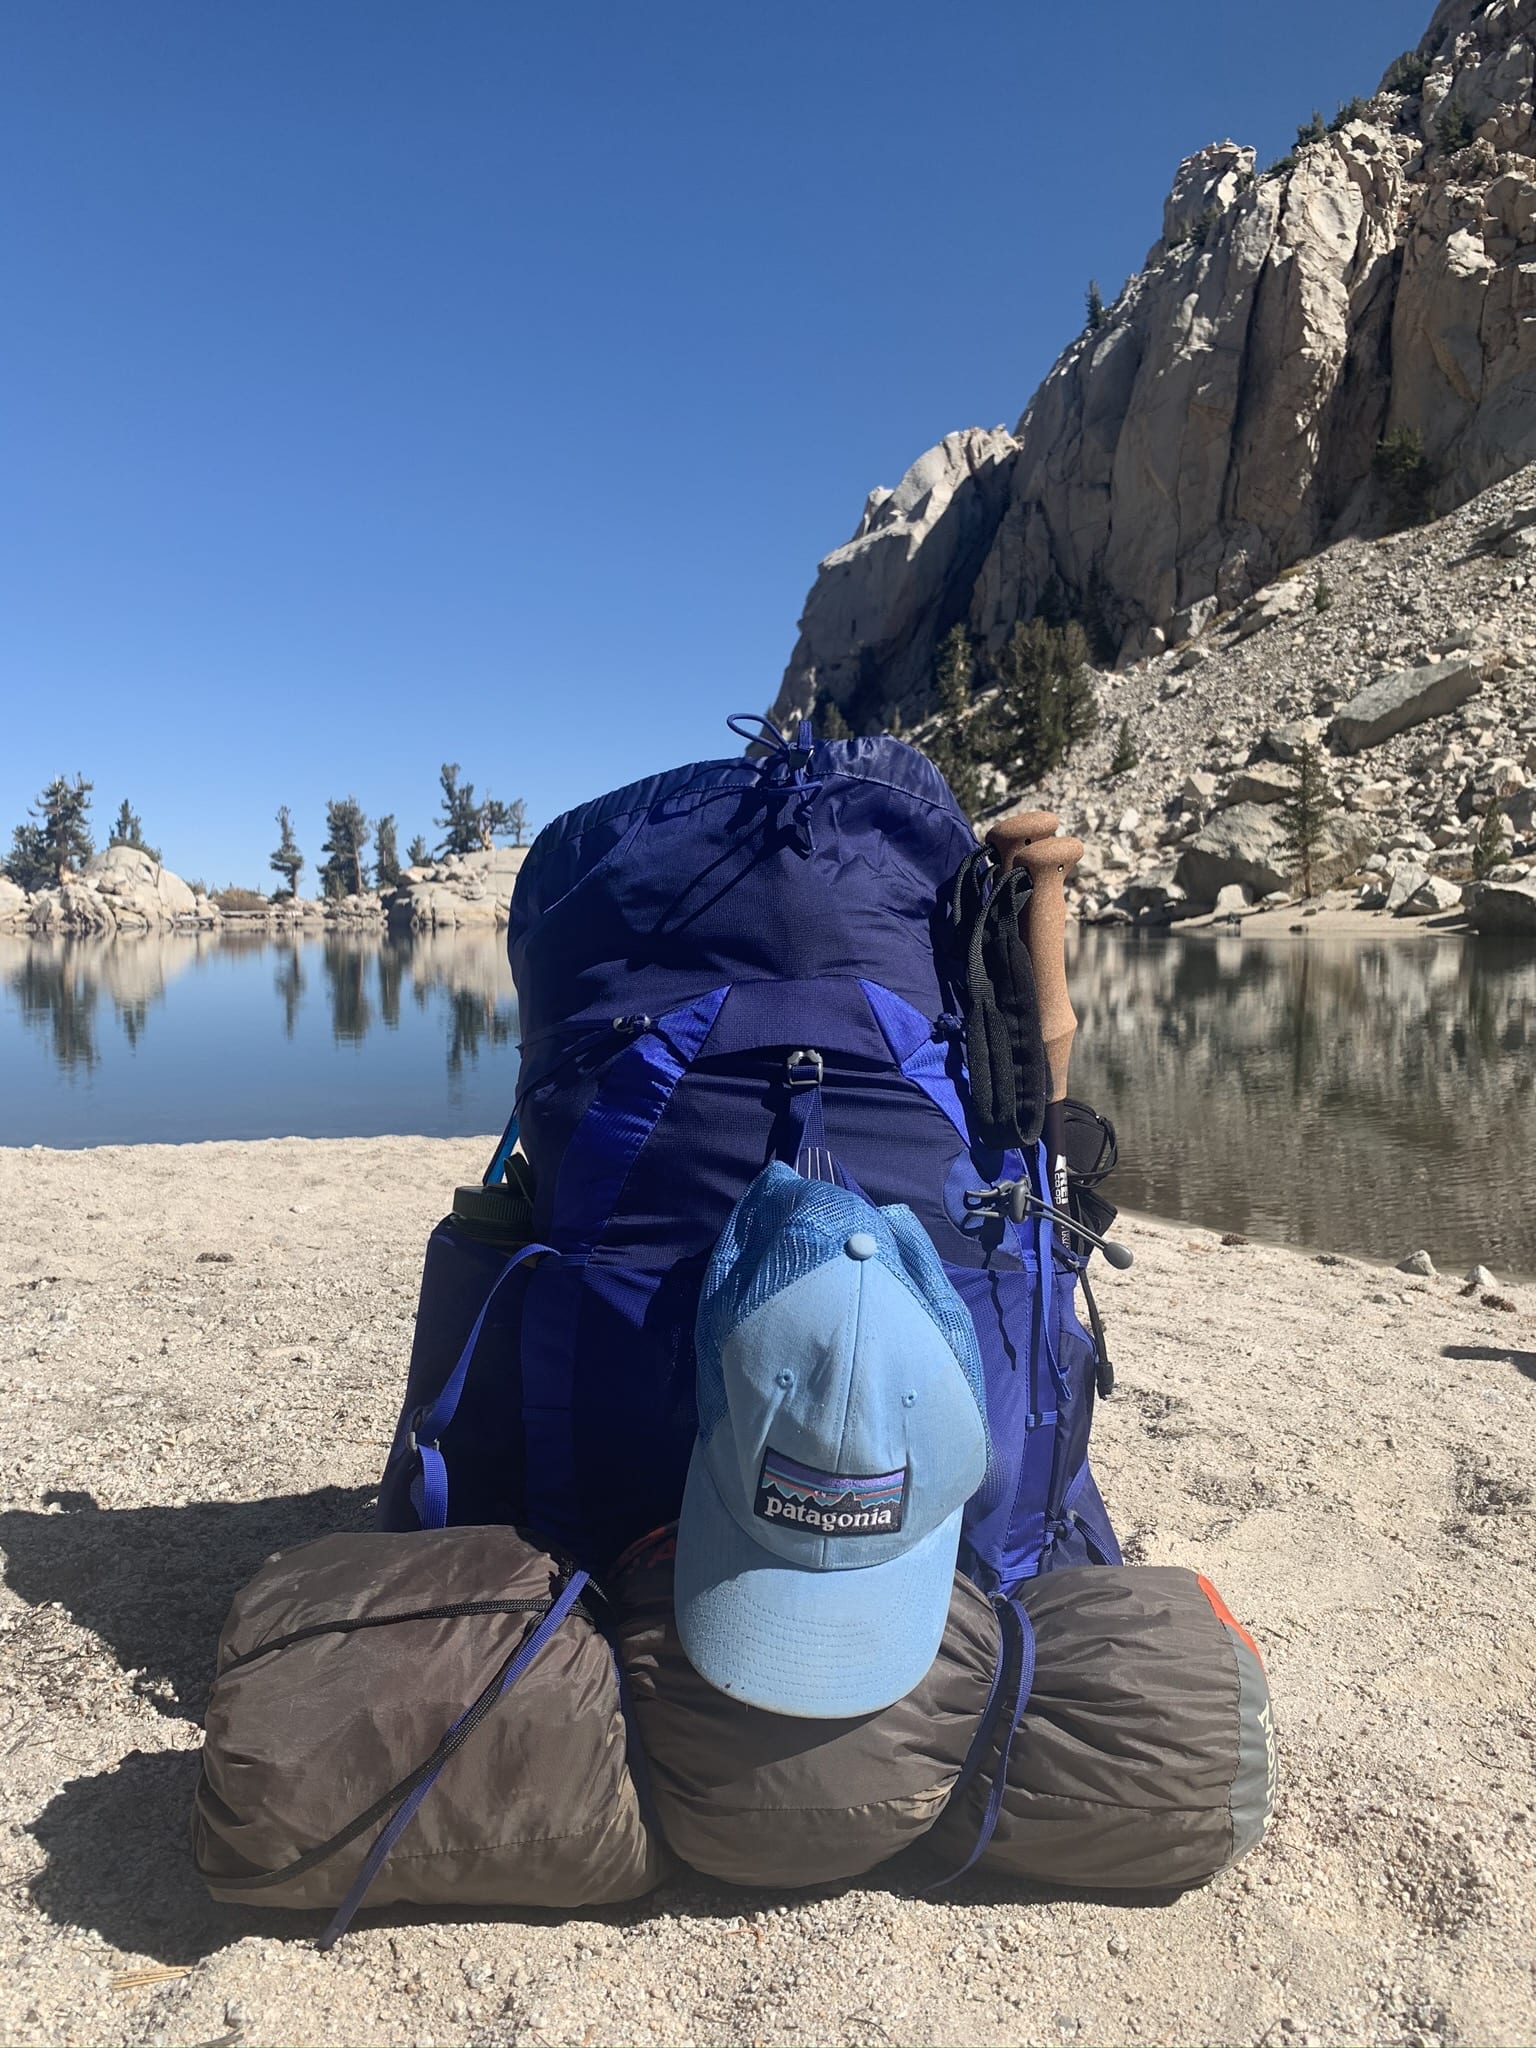
- You will need to keep your food in a bear canister (the critters are serious here!)They will give you one at the ranger station where you pick up your permits. You will have to attach this to your pack in and out of the hike.
- You need to pack out all your waste (yeah that’s right…meaning poop) in a WAG bag. You will also get these when you pick up your permit.
- It does get really cold at night, so keep this in mind when buying a sleeping bag and packing layers (packing list below)
Permits for Hiking Mount Whitney
Permits for hiking Mount Whitney run on a lottery system, where you pick a few dates that you would prefer and then find out by email if you “won” any of them. The permits run from May 1st to November 1st, and I’d recommend trying for July, June or September. Anytime before that will mean more snow on the mountain and and time after will mean colder temperatures. We ended up going in October, and while we had an extremely beautiful day during summit, the night was f**cking freezing. Like coldest I’ve ever been in my life freezing.
Here’s the link for the Whitney Portal lottery
Hiking Mount Whitney
The night before the hike, you should book a hotel or plan on camping near this town Lone Pine. Lone Pine is 13 miles to Whitney Portal. We booked a hotel since I didn’t want to have to repack my tent from camping the night before. I’d recommend booking the hotel as soon as possible, since this is a popular area for hiking and hotels and campgrounds get full quickly. If you want to camp, you can also camp at Whitney Portal which is closer to the hike.
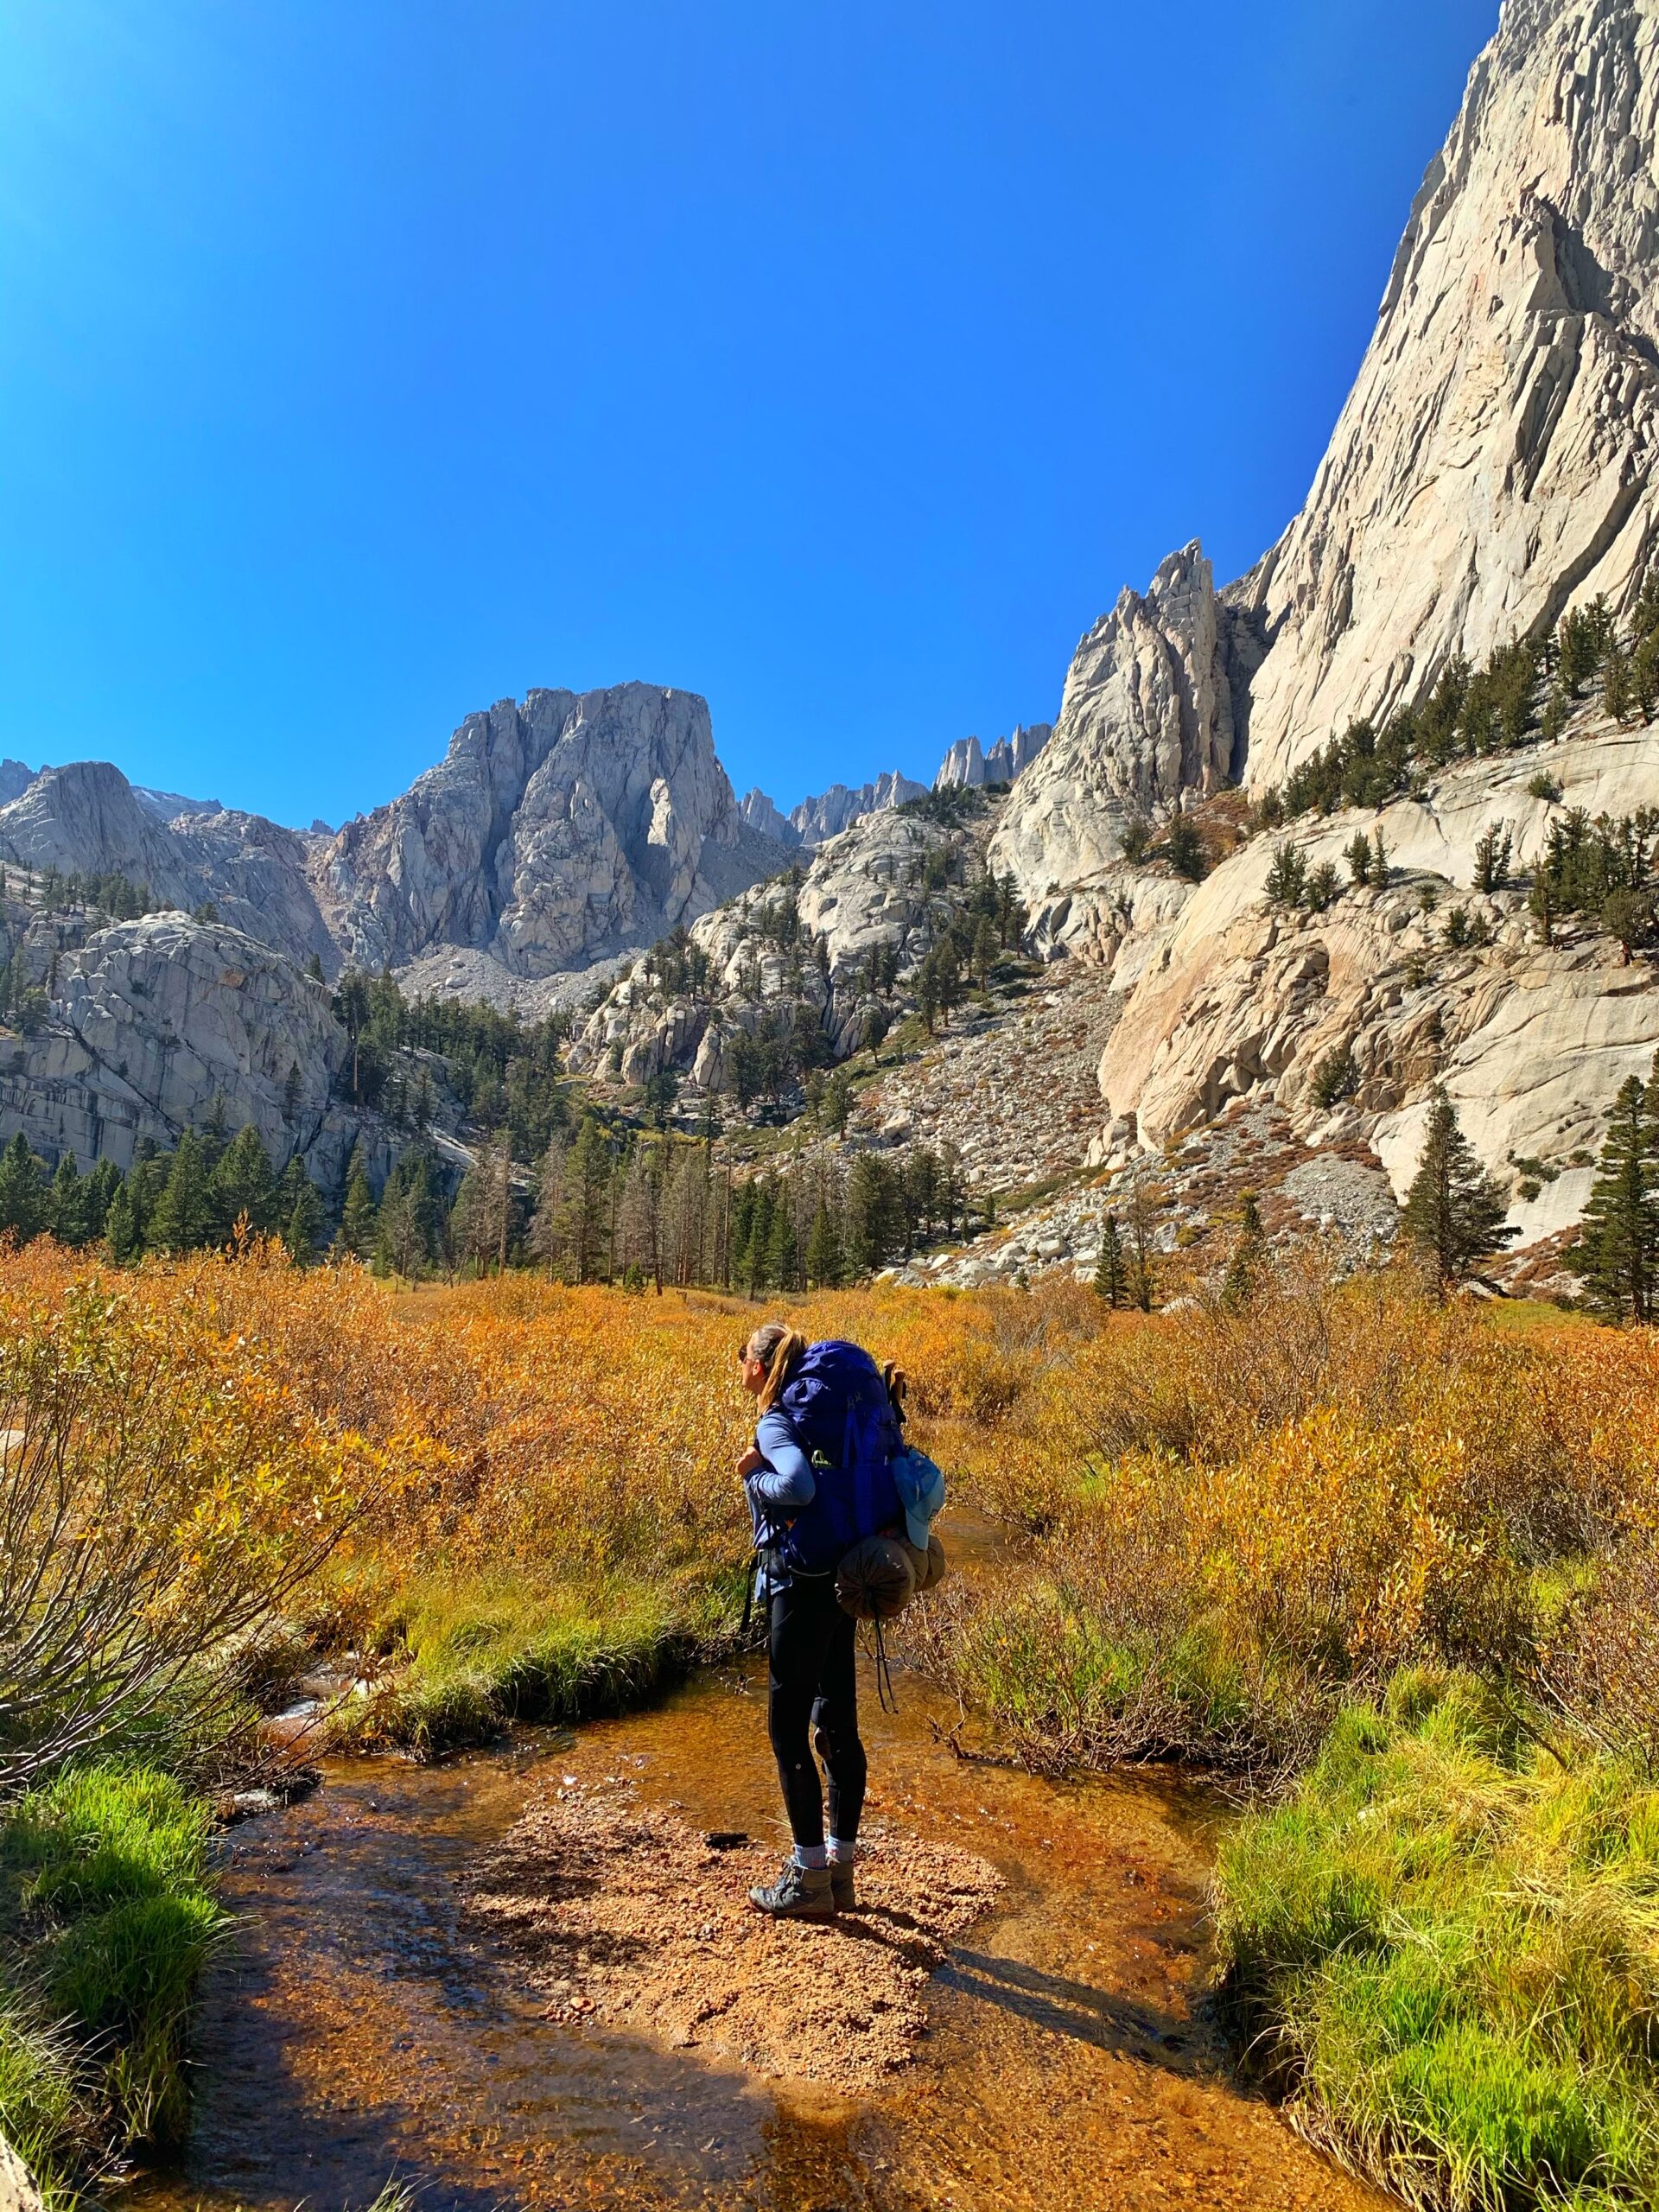
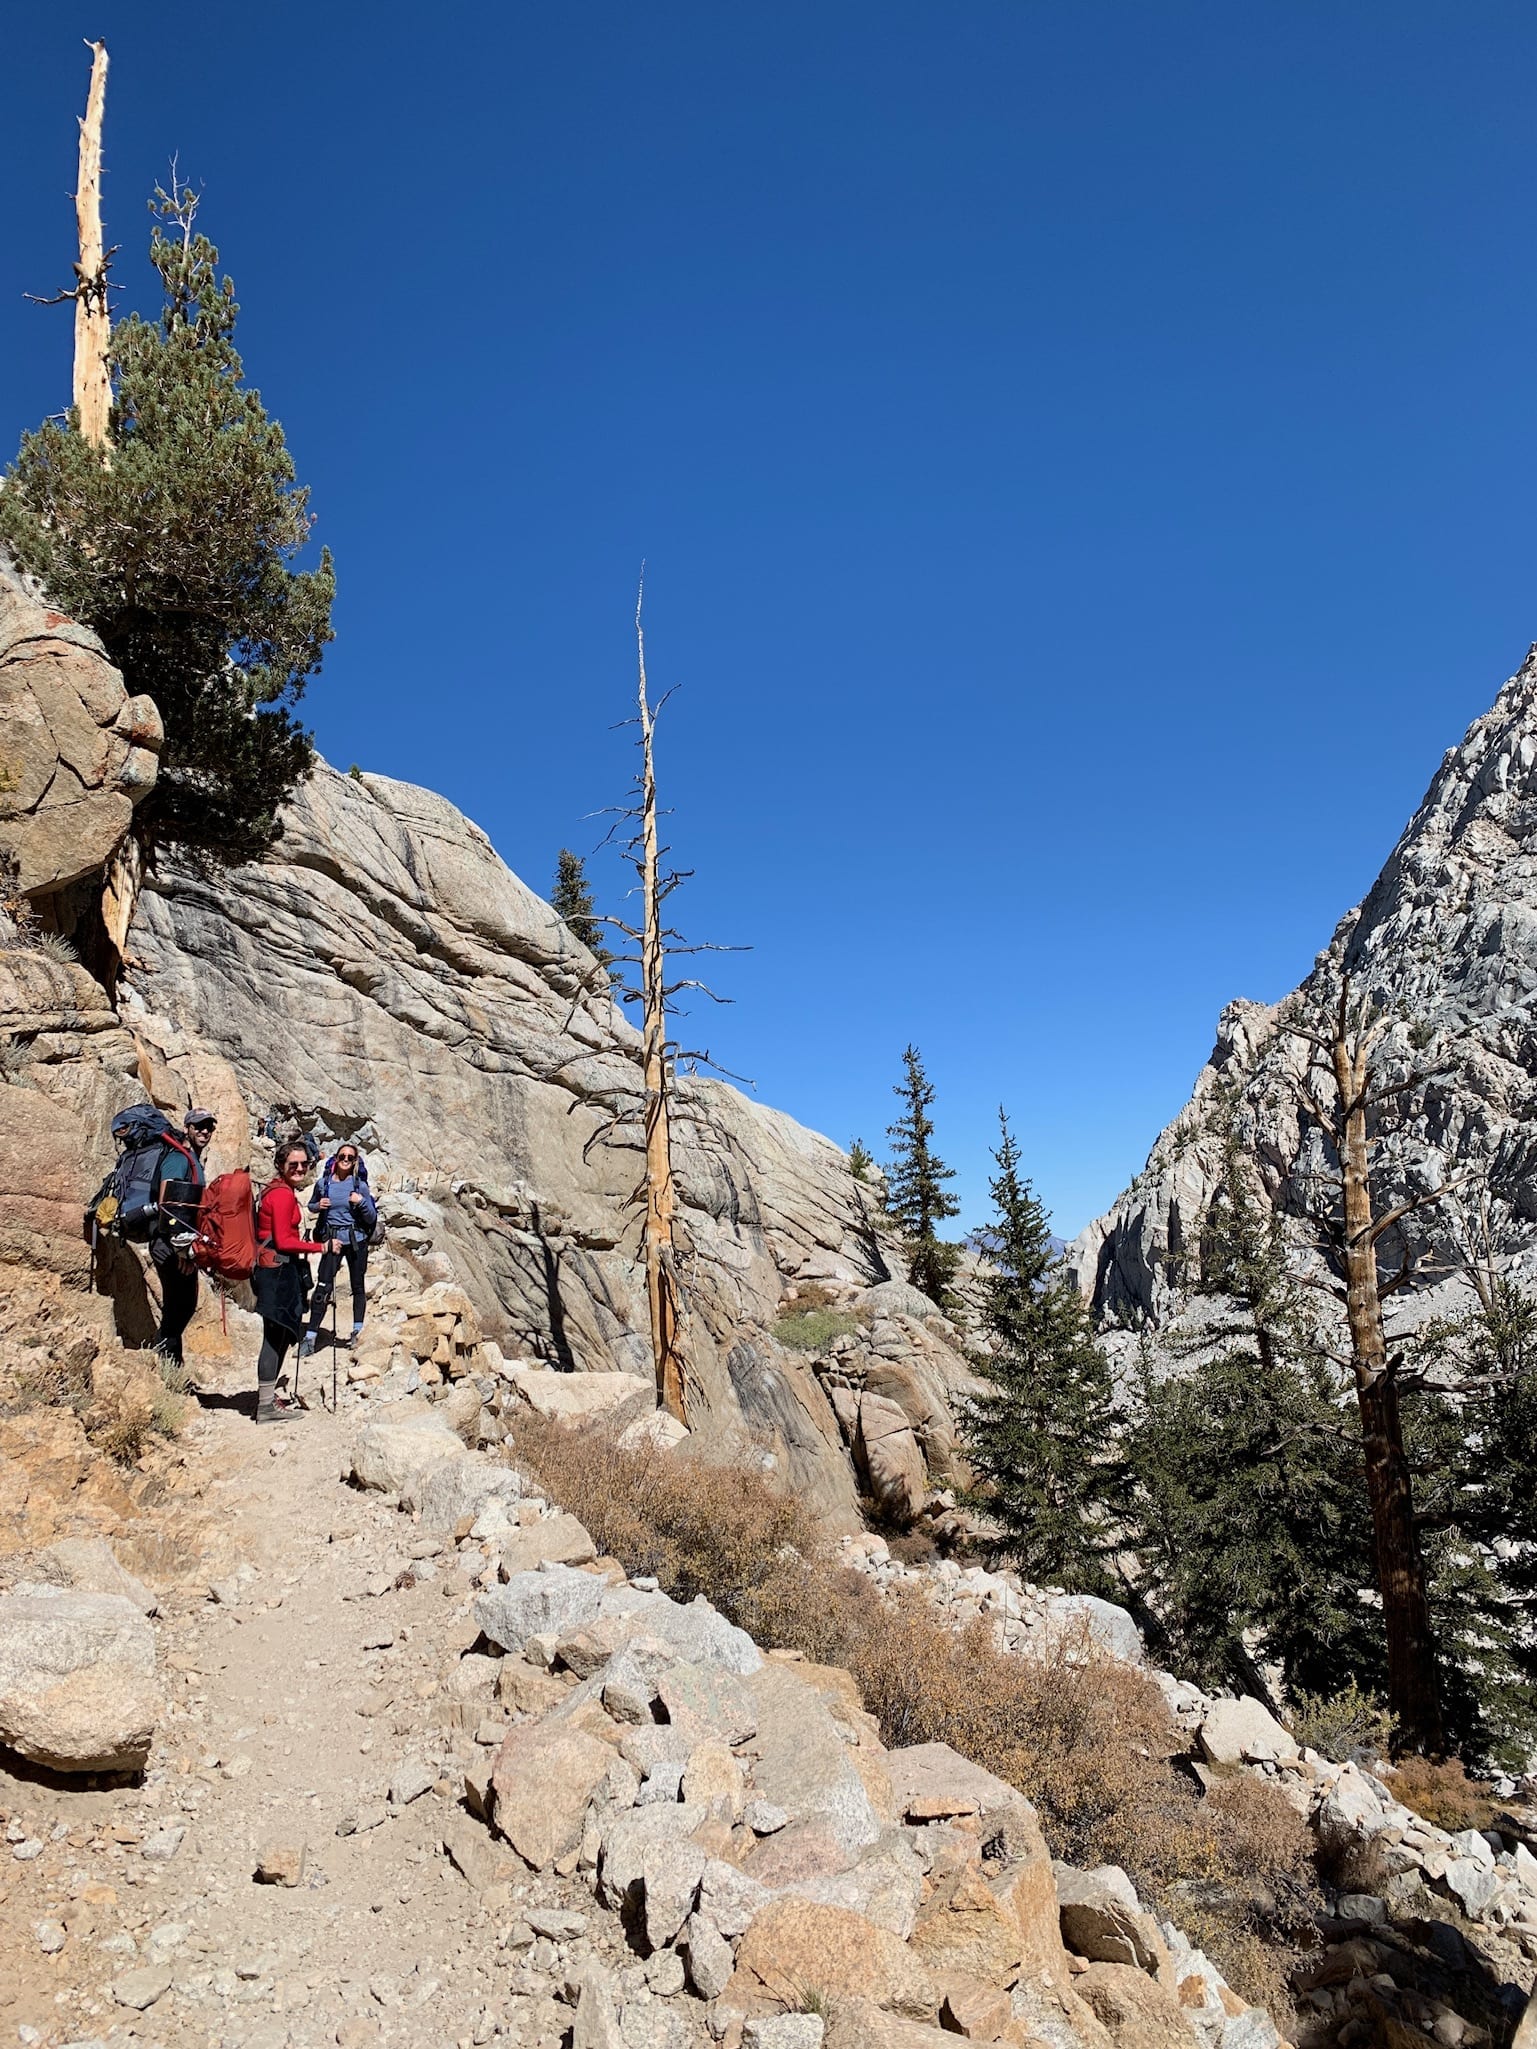
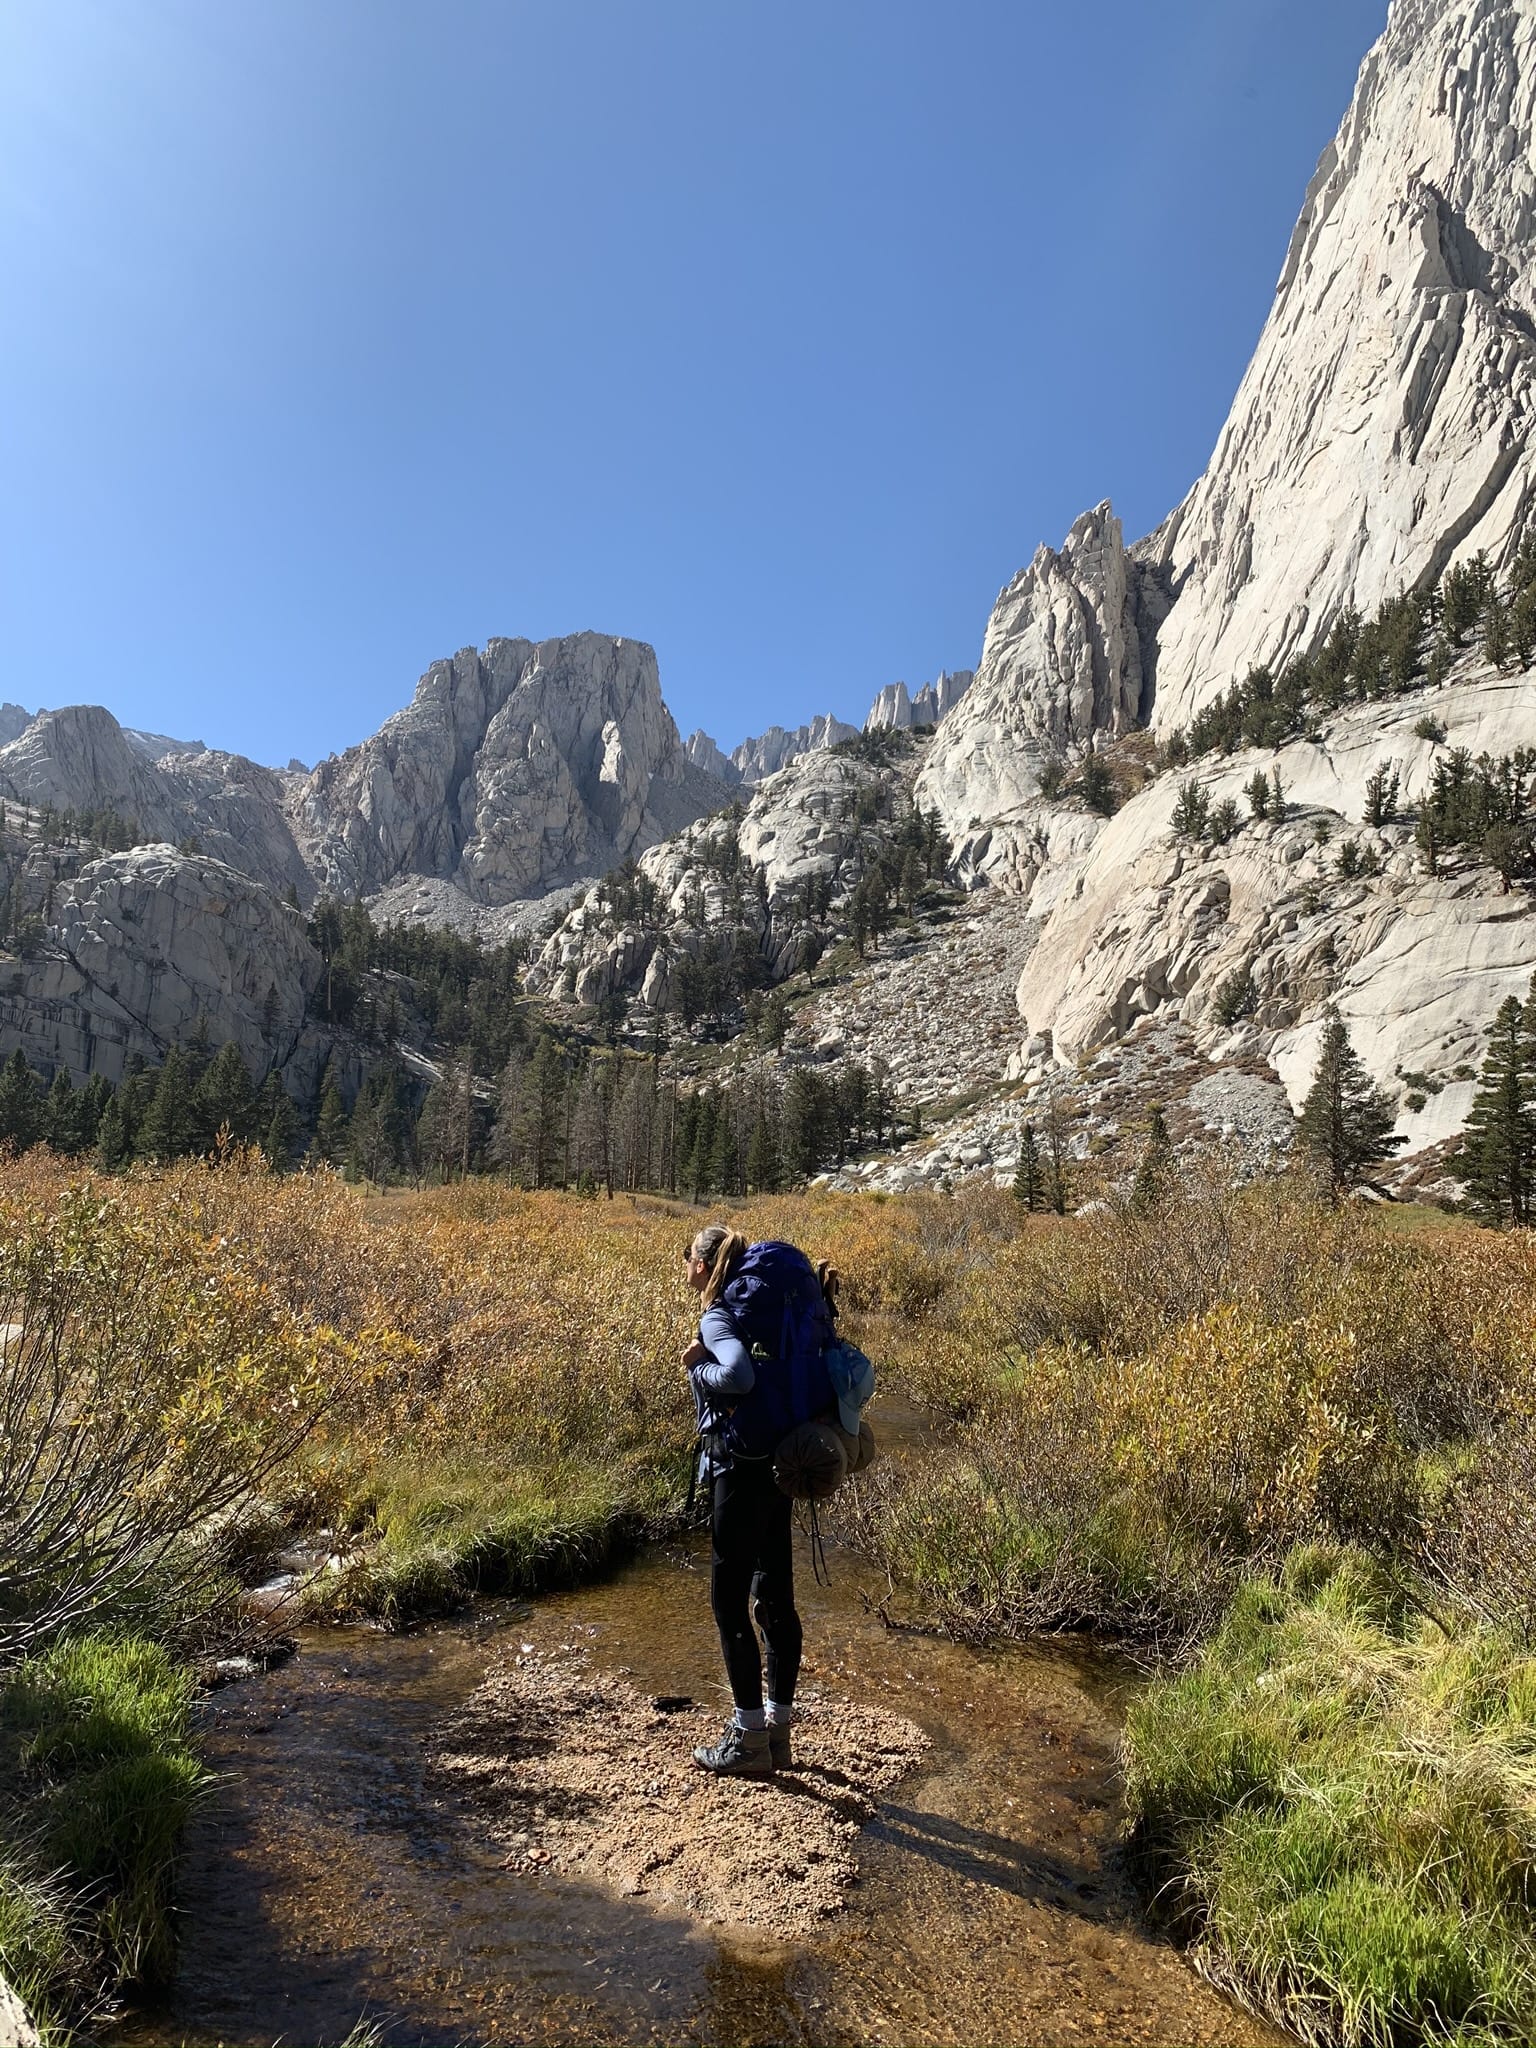
The morning of the hike we drove to the trailhead and parked our car in the lot. Right after the trailhead, we passed a scale, you can weigh your pack here if you choose to. The trail starts by going gradually uphill and through golden trees and pine trees. There were also some fun logs to hike over (which could be a little tricky to balance on with a pack), and we decided to stop at a lake for lunch.
Once we ate our sandwiches, we started hiking Mount Whitney again by crossing into “the Whitney Zone”, which is the part where a permit is required. From here, a set of rocky switchbacks would take us up to a golden field and we would be exposed from here on out.
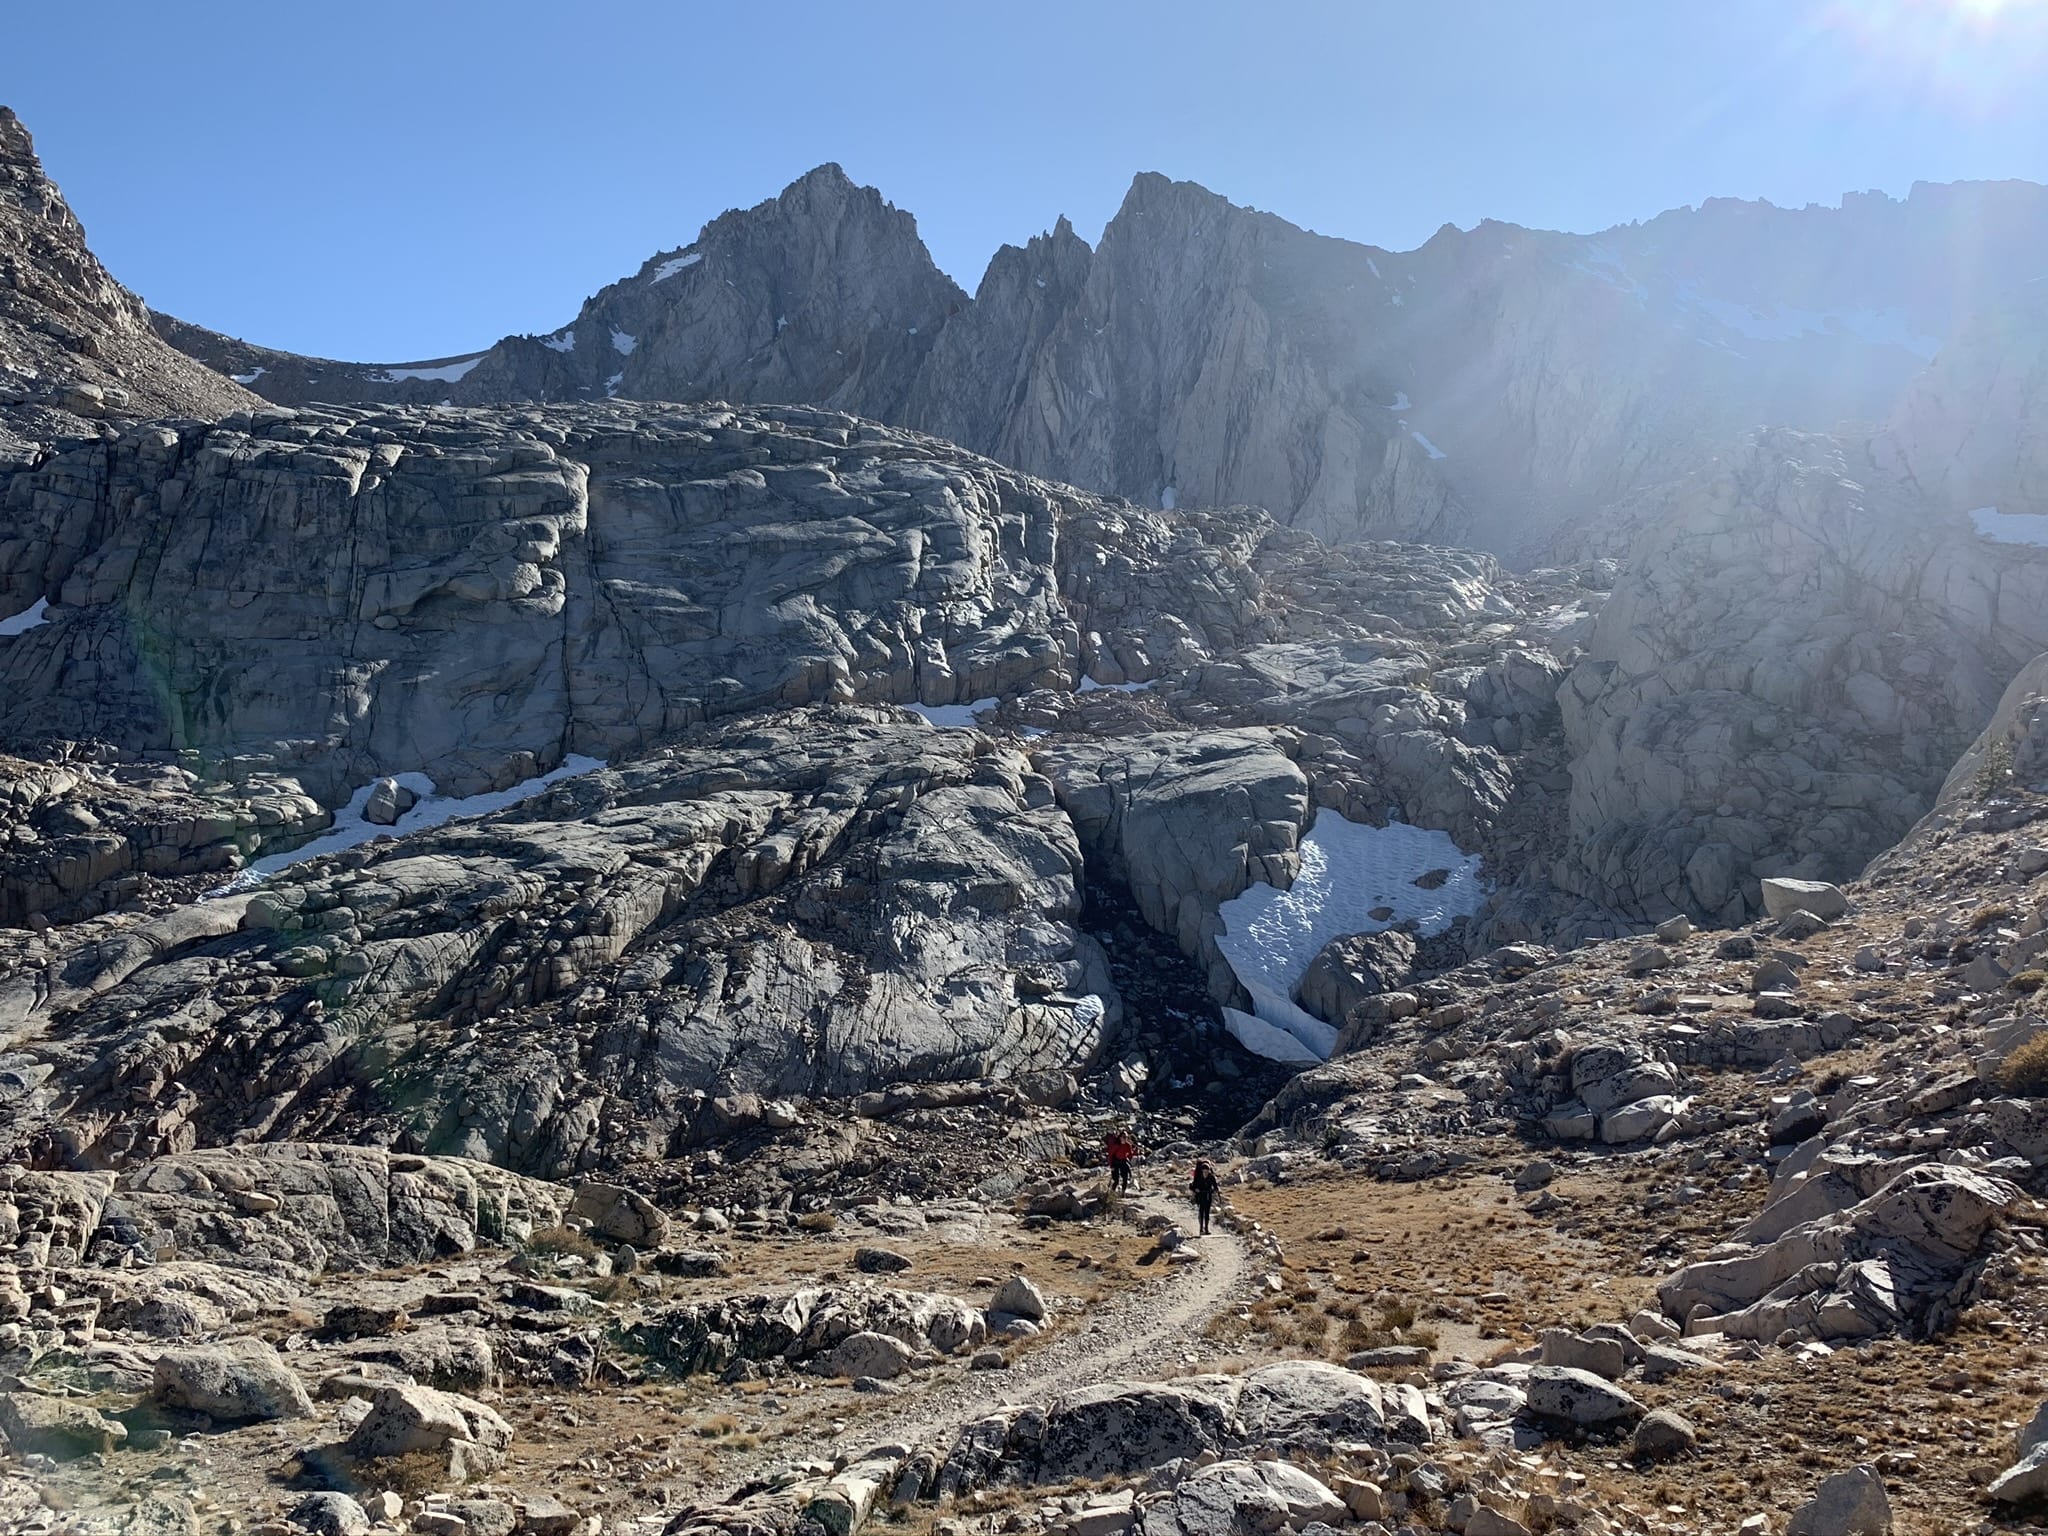
After what seemed like a never-ending rock face, each turn revealing more trail, we reached the Trail Camp. We were pretty exhausted by the end of the day, but we still had to set up the tent and filter water for our camel paks for the next day.
I highly recommend buying a water pump filter for hiking Mount Whitney. I cannot stress this enough. We had bags to filter water, which worked great in Havasu Falls, but were not fun to use in the freezing cold. They also kept ripping which made it very stressful to get water.
As night crept in, so did the freezing cold temperatures, so we headed to our sleeping bags and went to bed. Sleeping at altitude was tough, I’m not sure there’s much I could recommend for that. Make sure to buy a really comfortable sleeping pad (love this one).
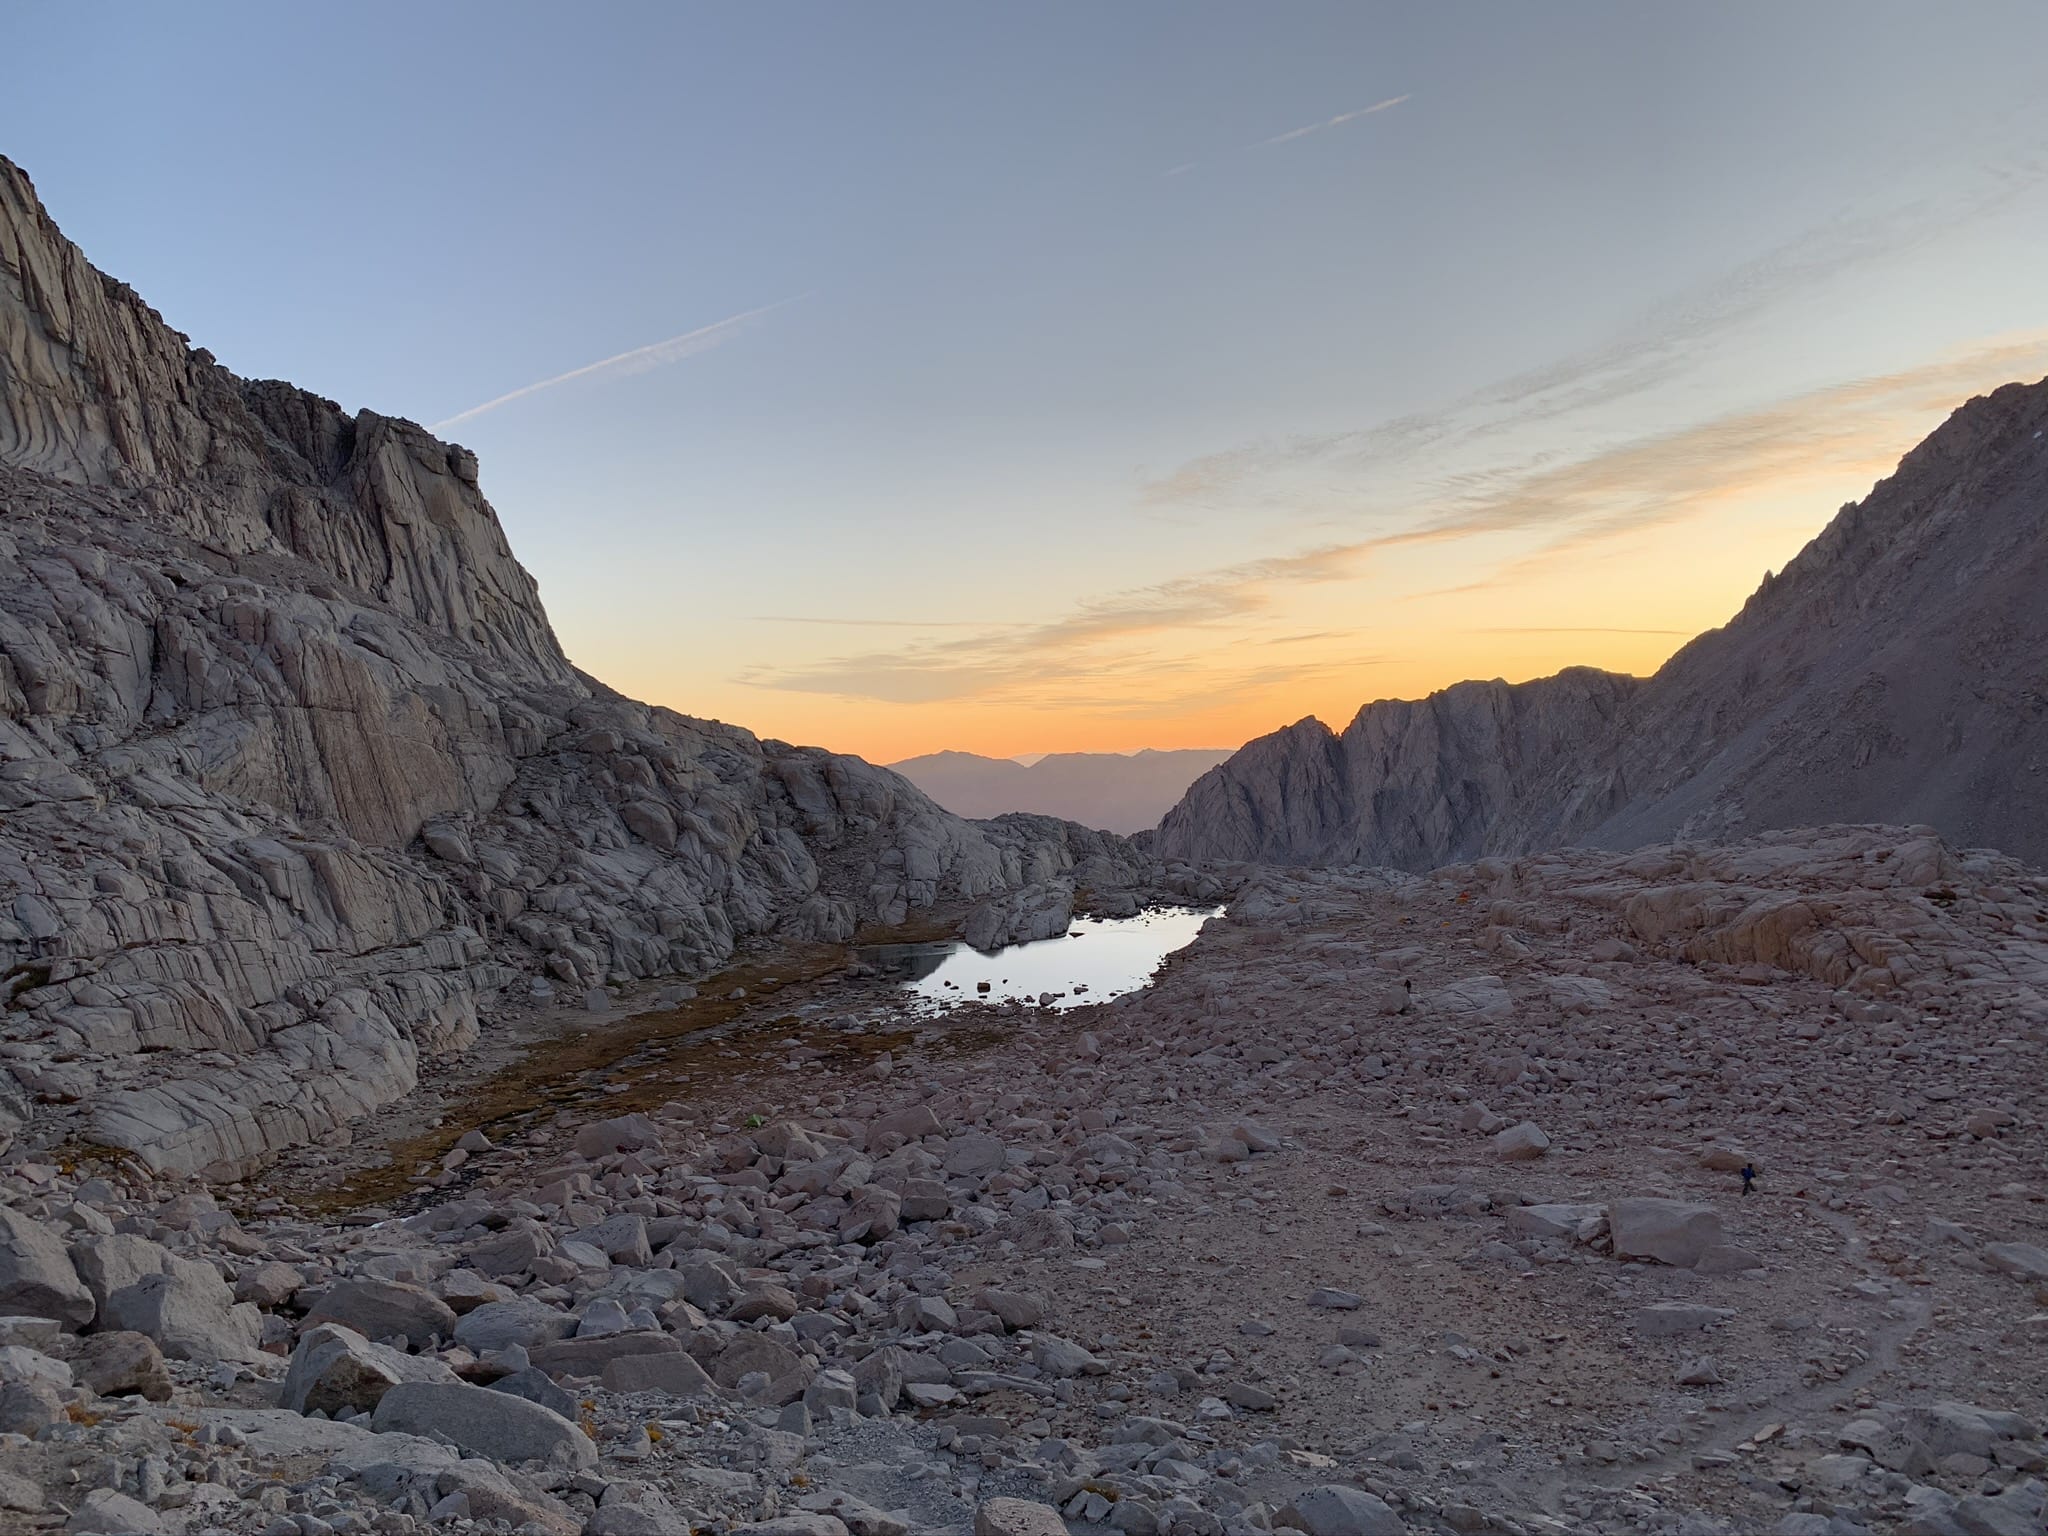
We woke up early the next morning (around 4 am) to summit since we wanted to see the sunrise. Unfortunately our water froze over night and it ended up being a long and complicated ordeal to get more water to unfreeze our camelpaks. I’d recommend sleeping with your water in the tent to hopefully avoid this issue. We didn’t end up leaving Trail Camp until sunrise because of this.
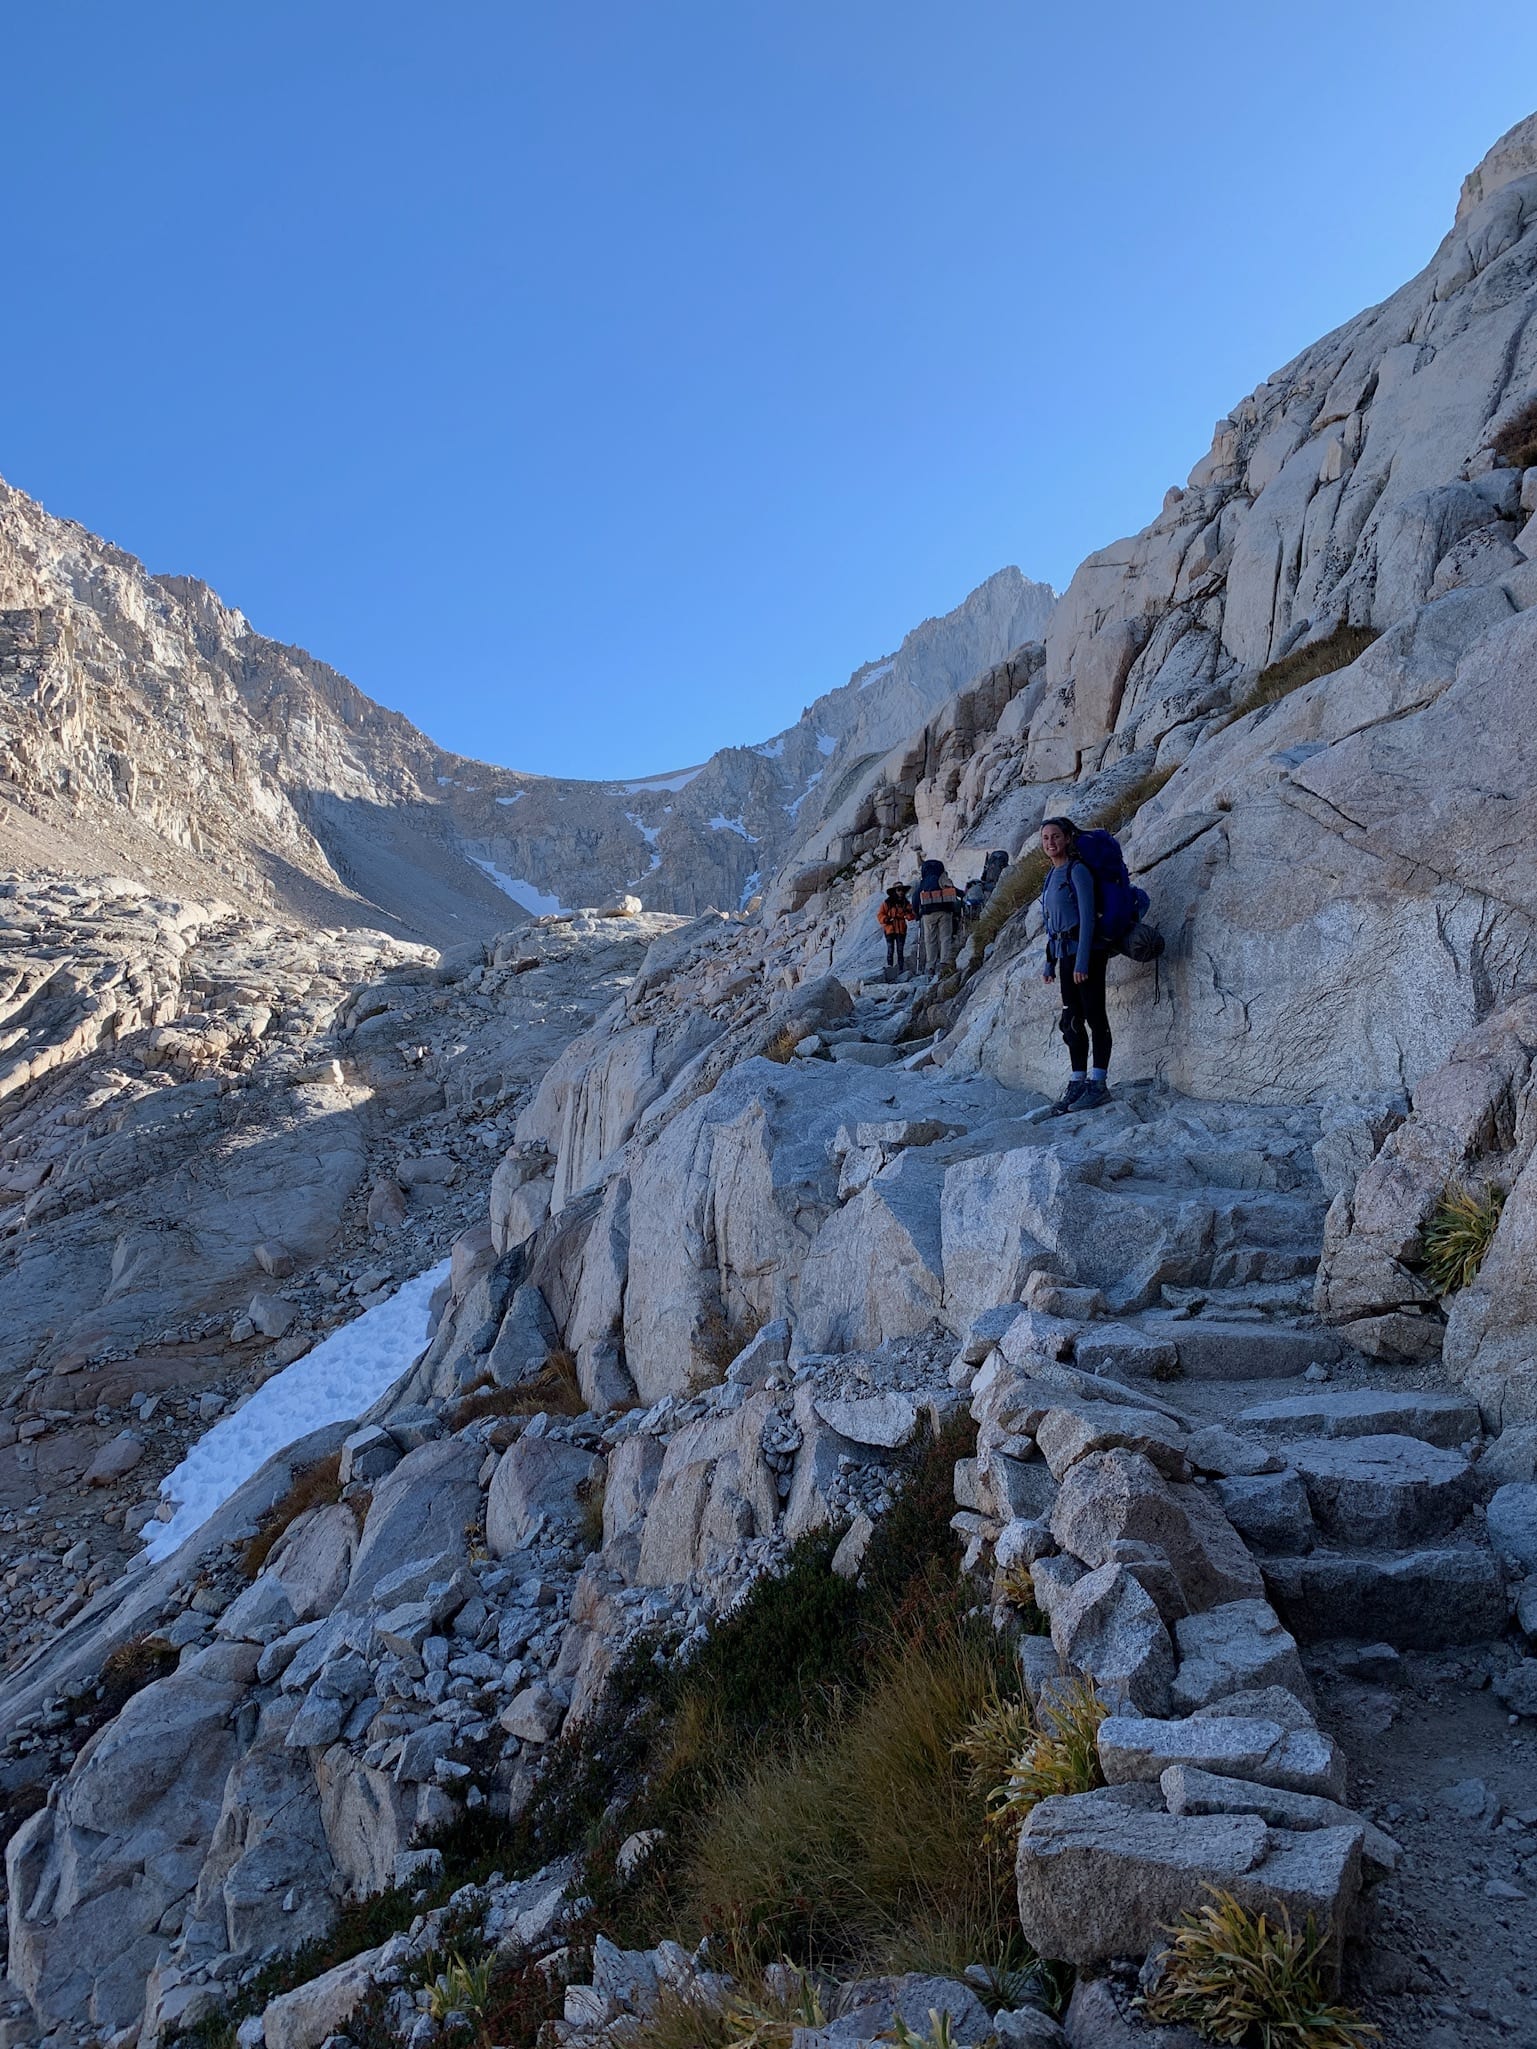
The first part of the second day are the rocky 99 switchbacks. I was honestly dreading these switchbacks the entire time, but without my pack on, it really wasn’t too bad. The switchbacks aren’t steep at all, there’s just a lot of them.

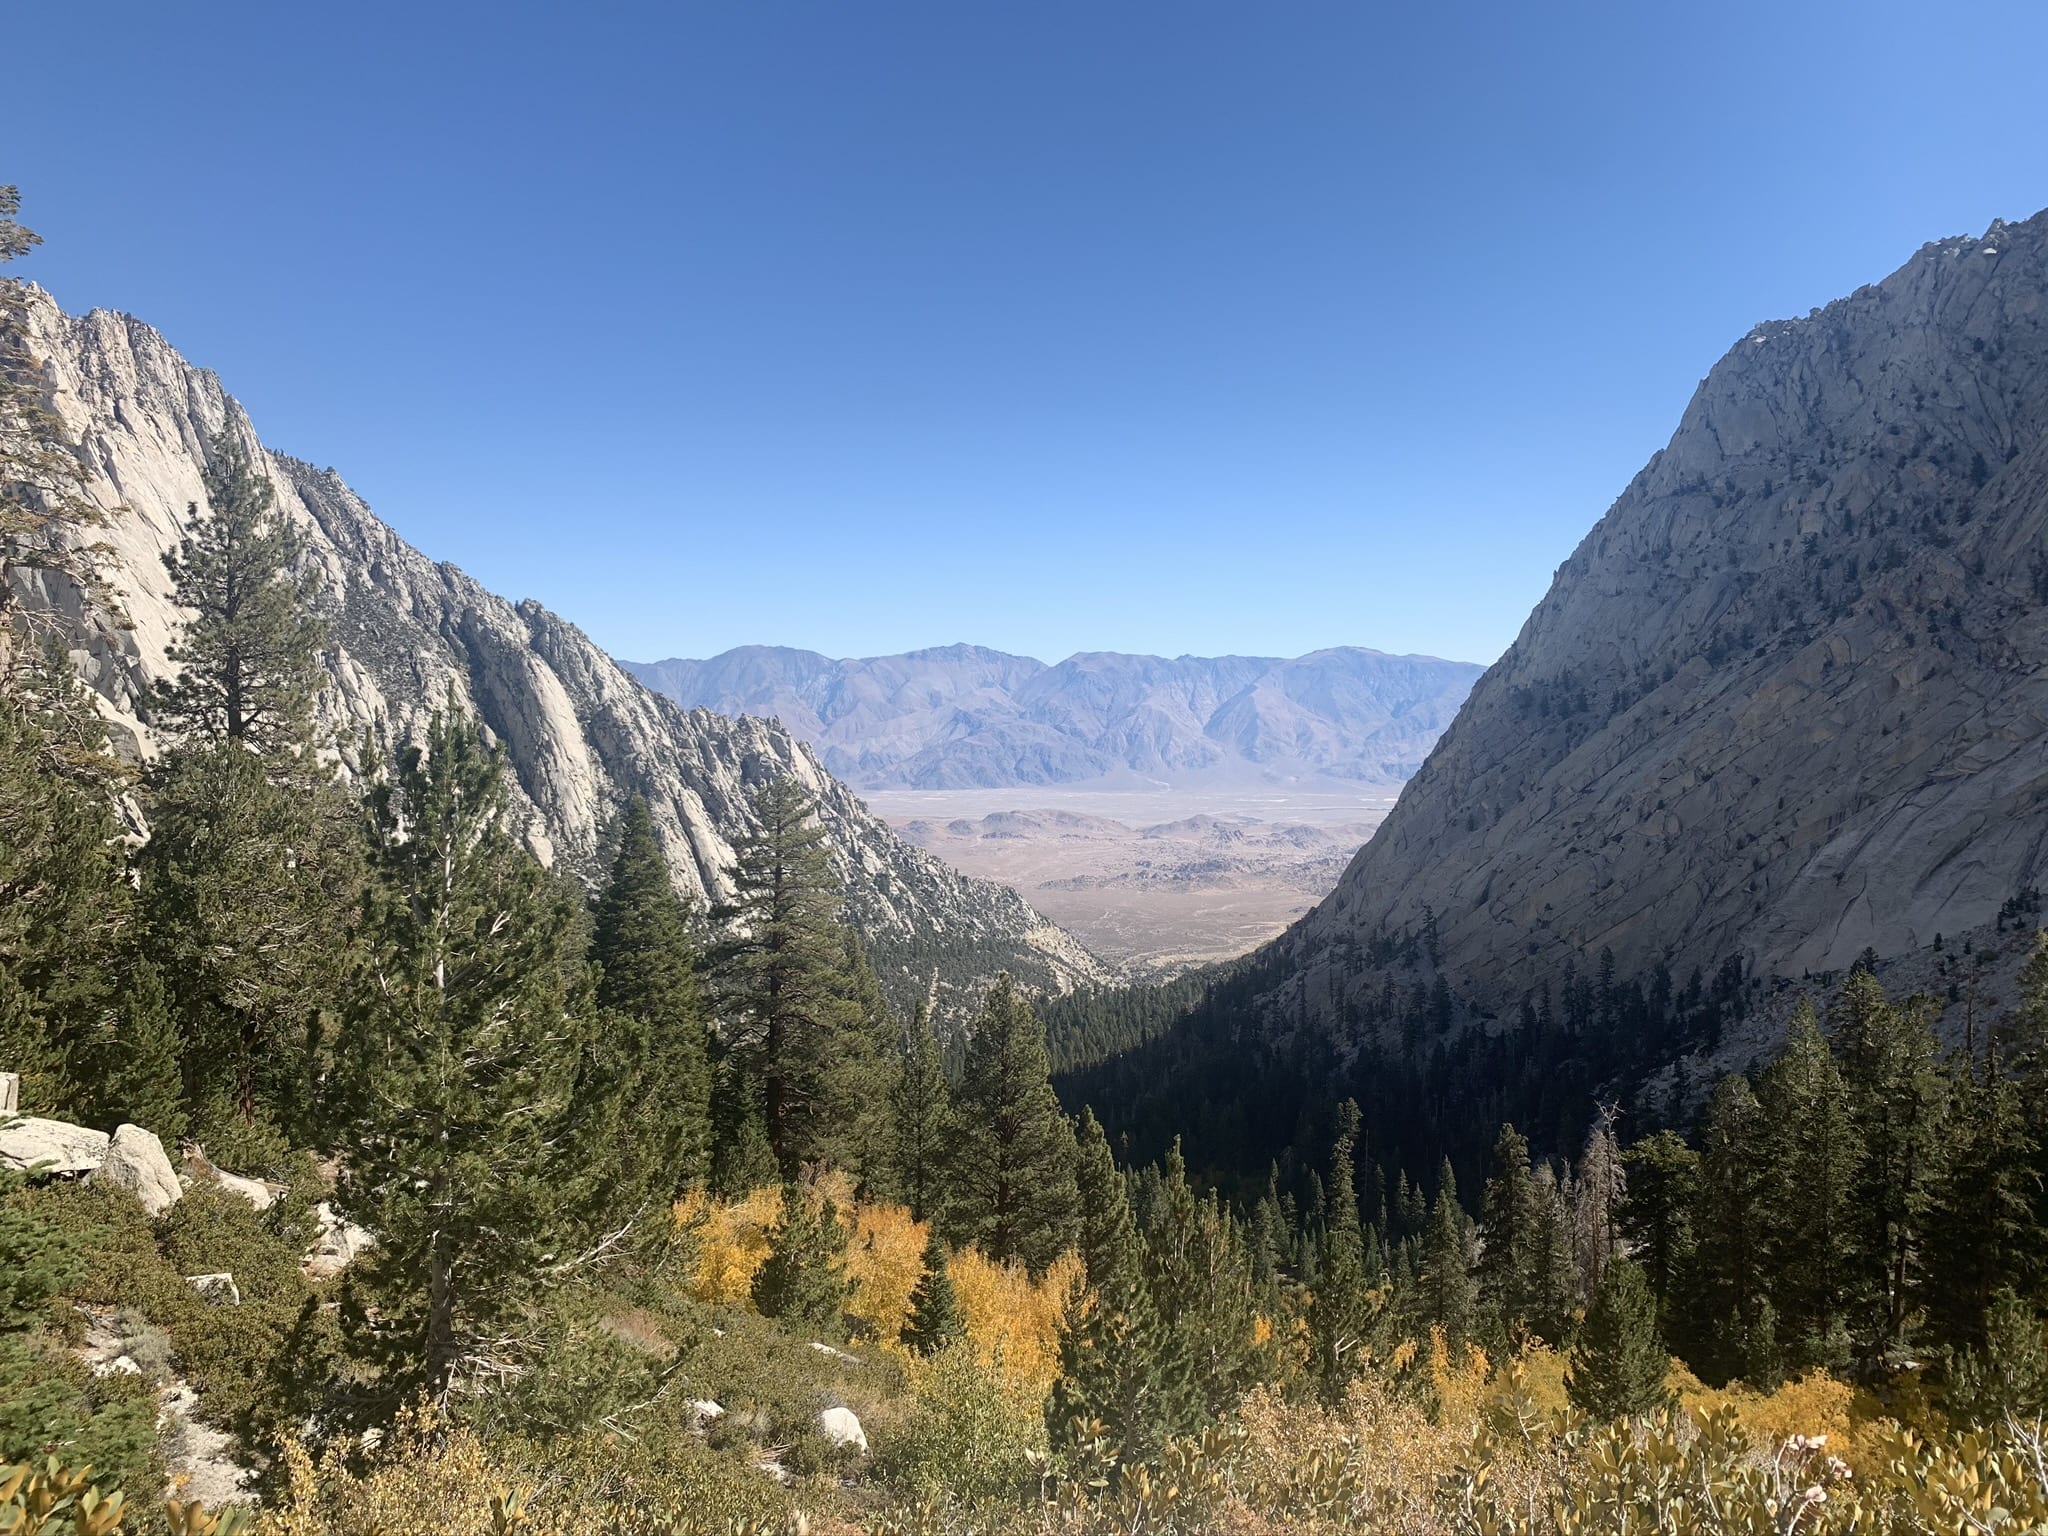
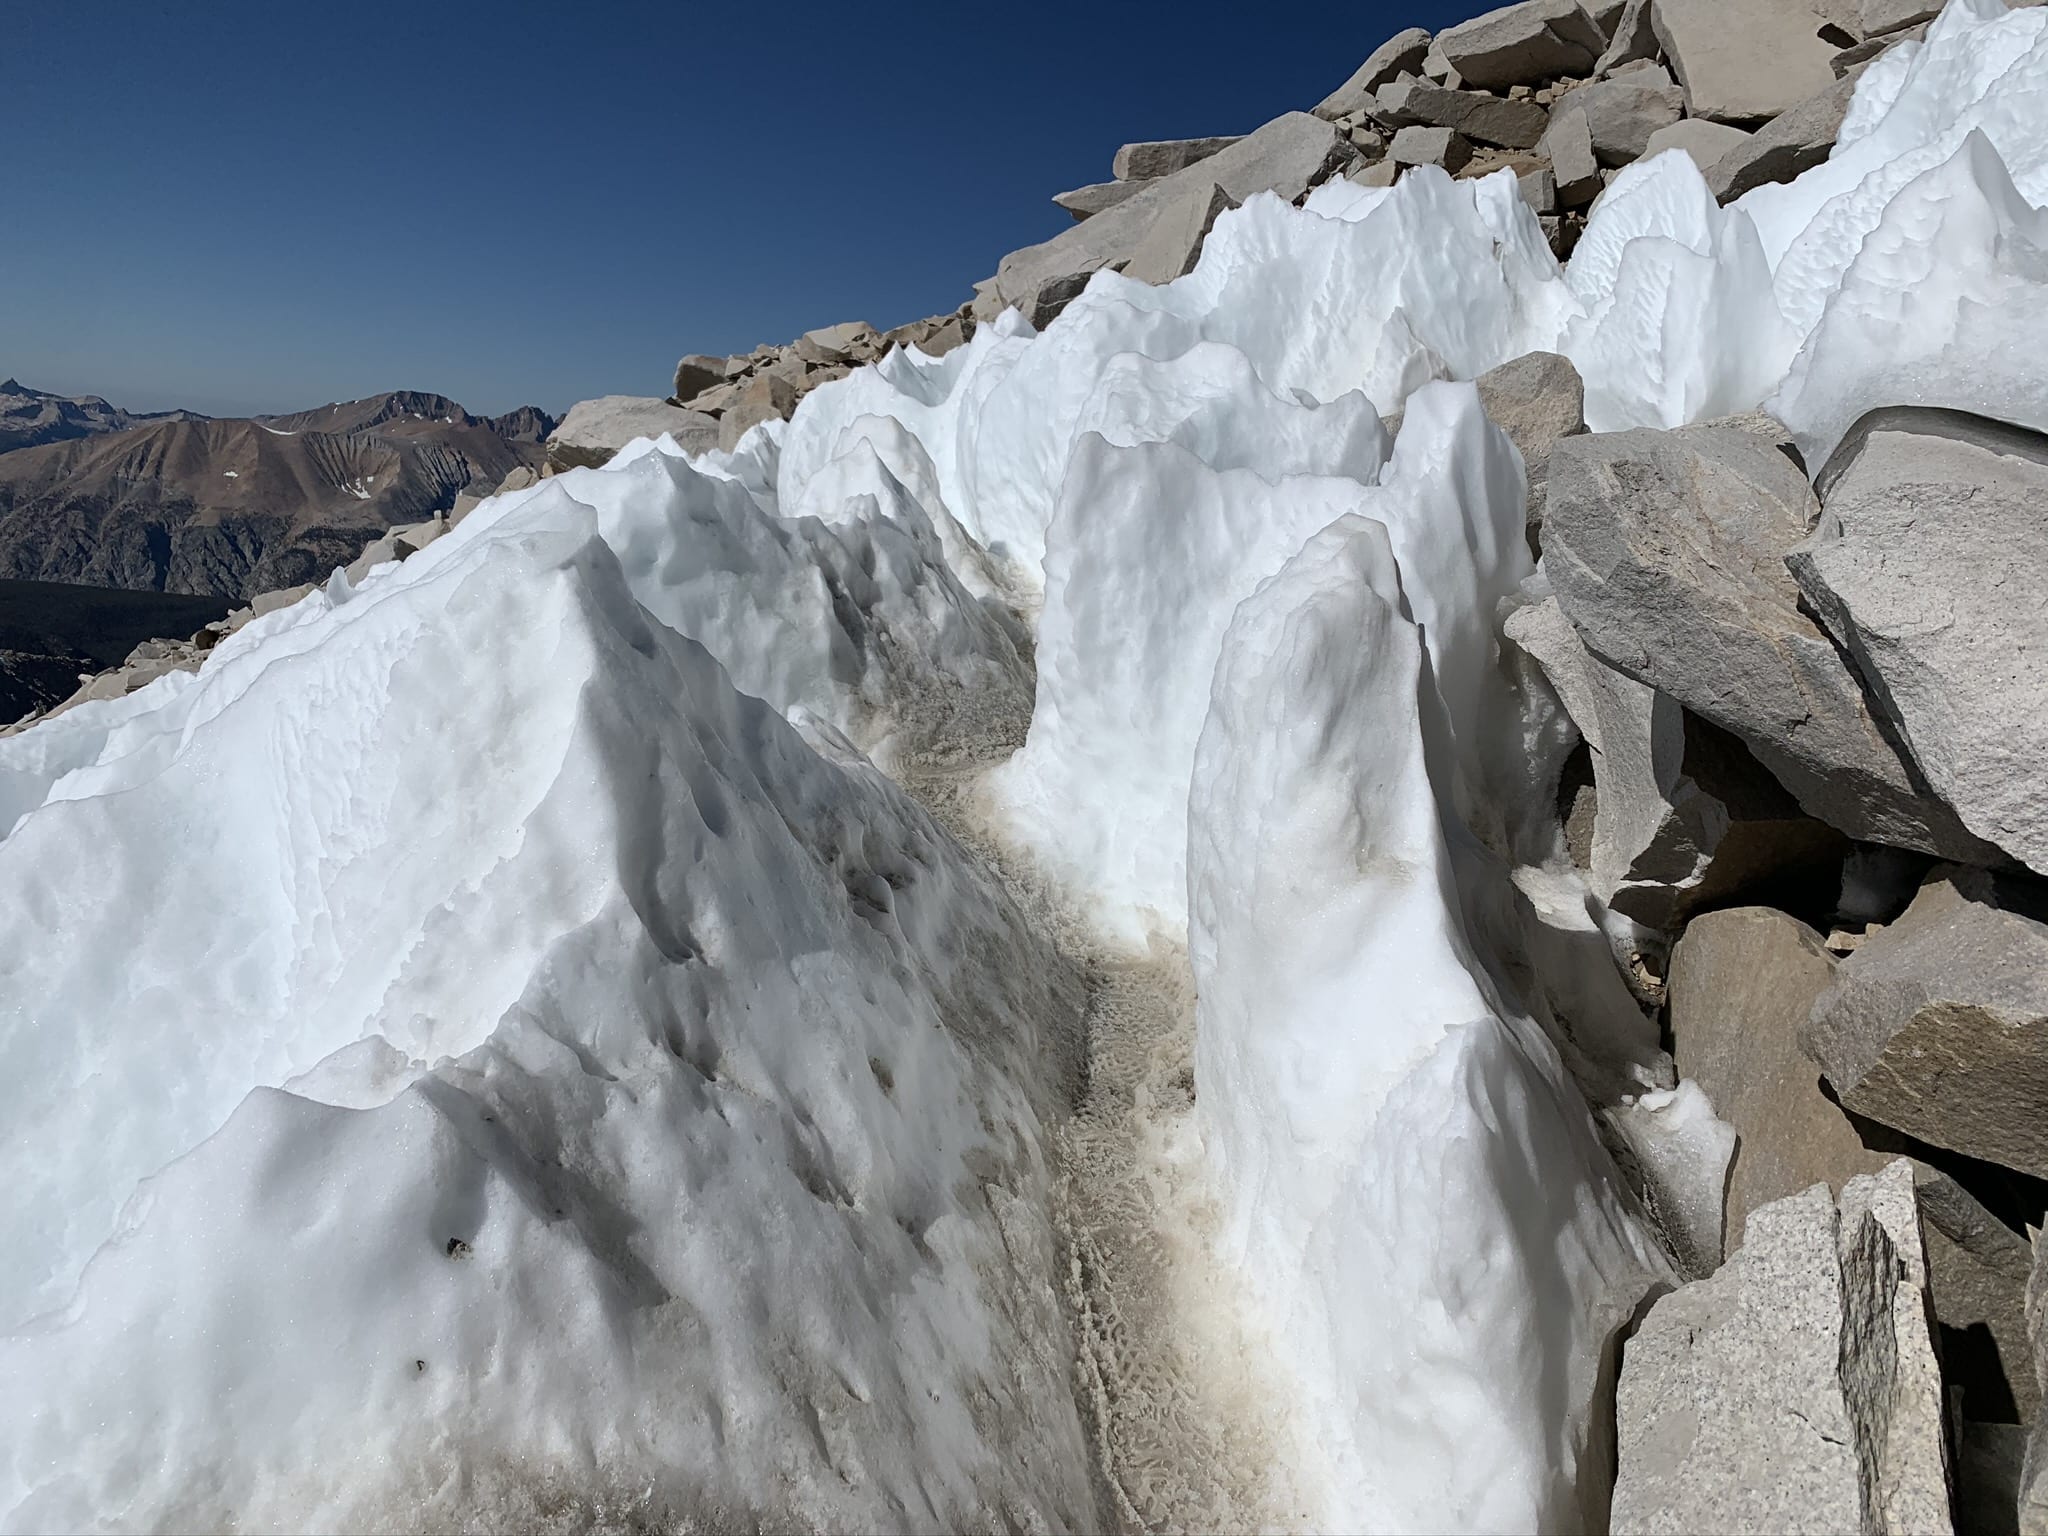
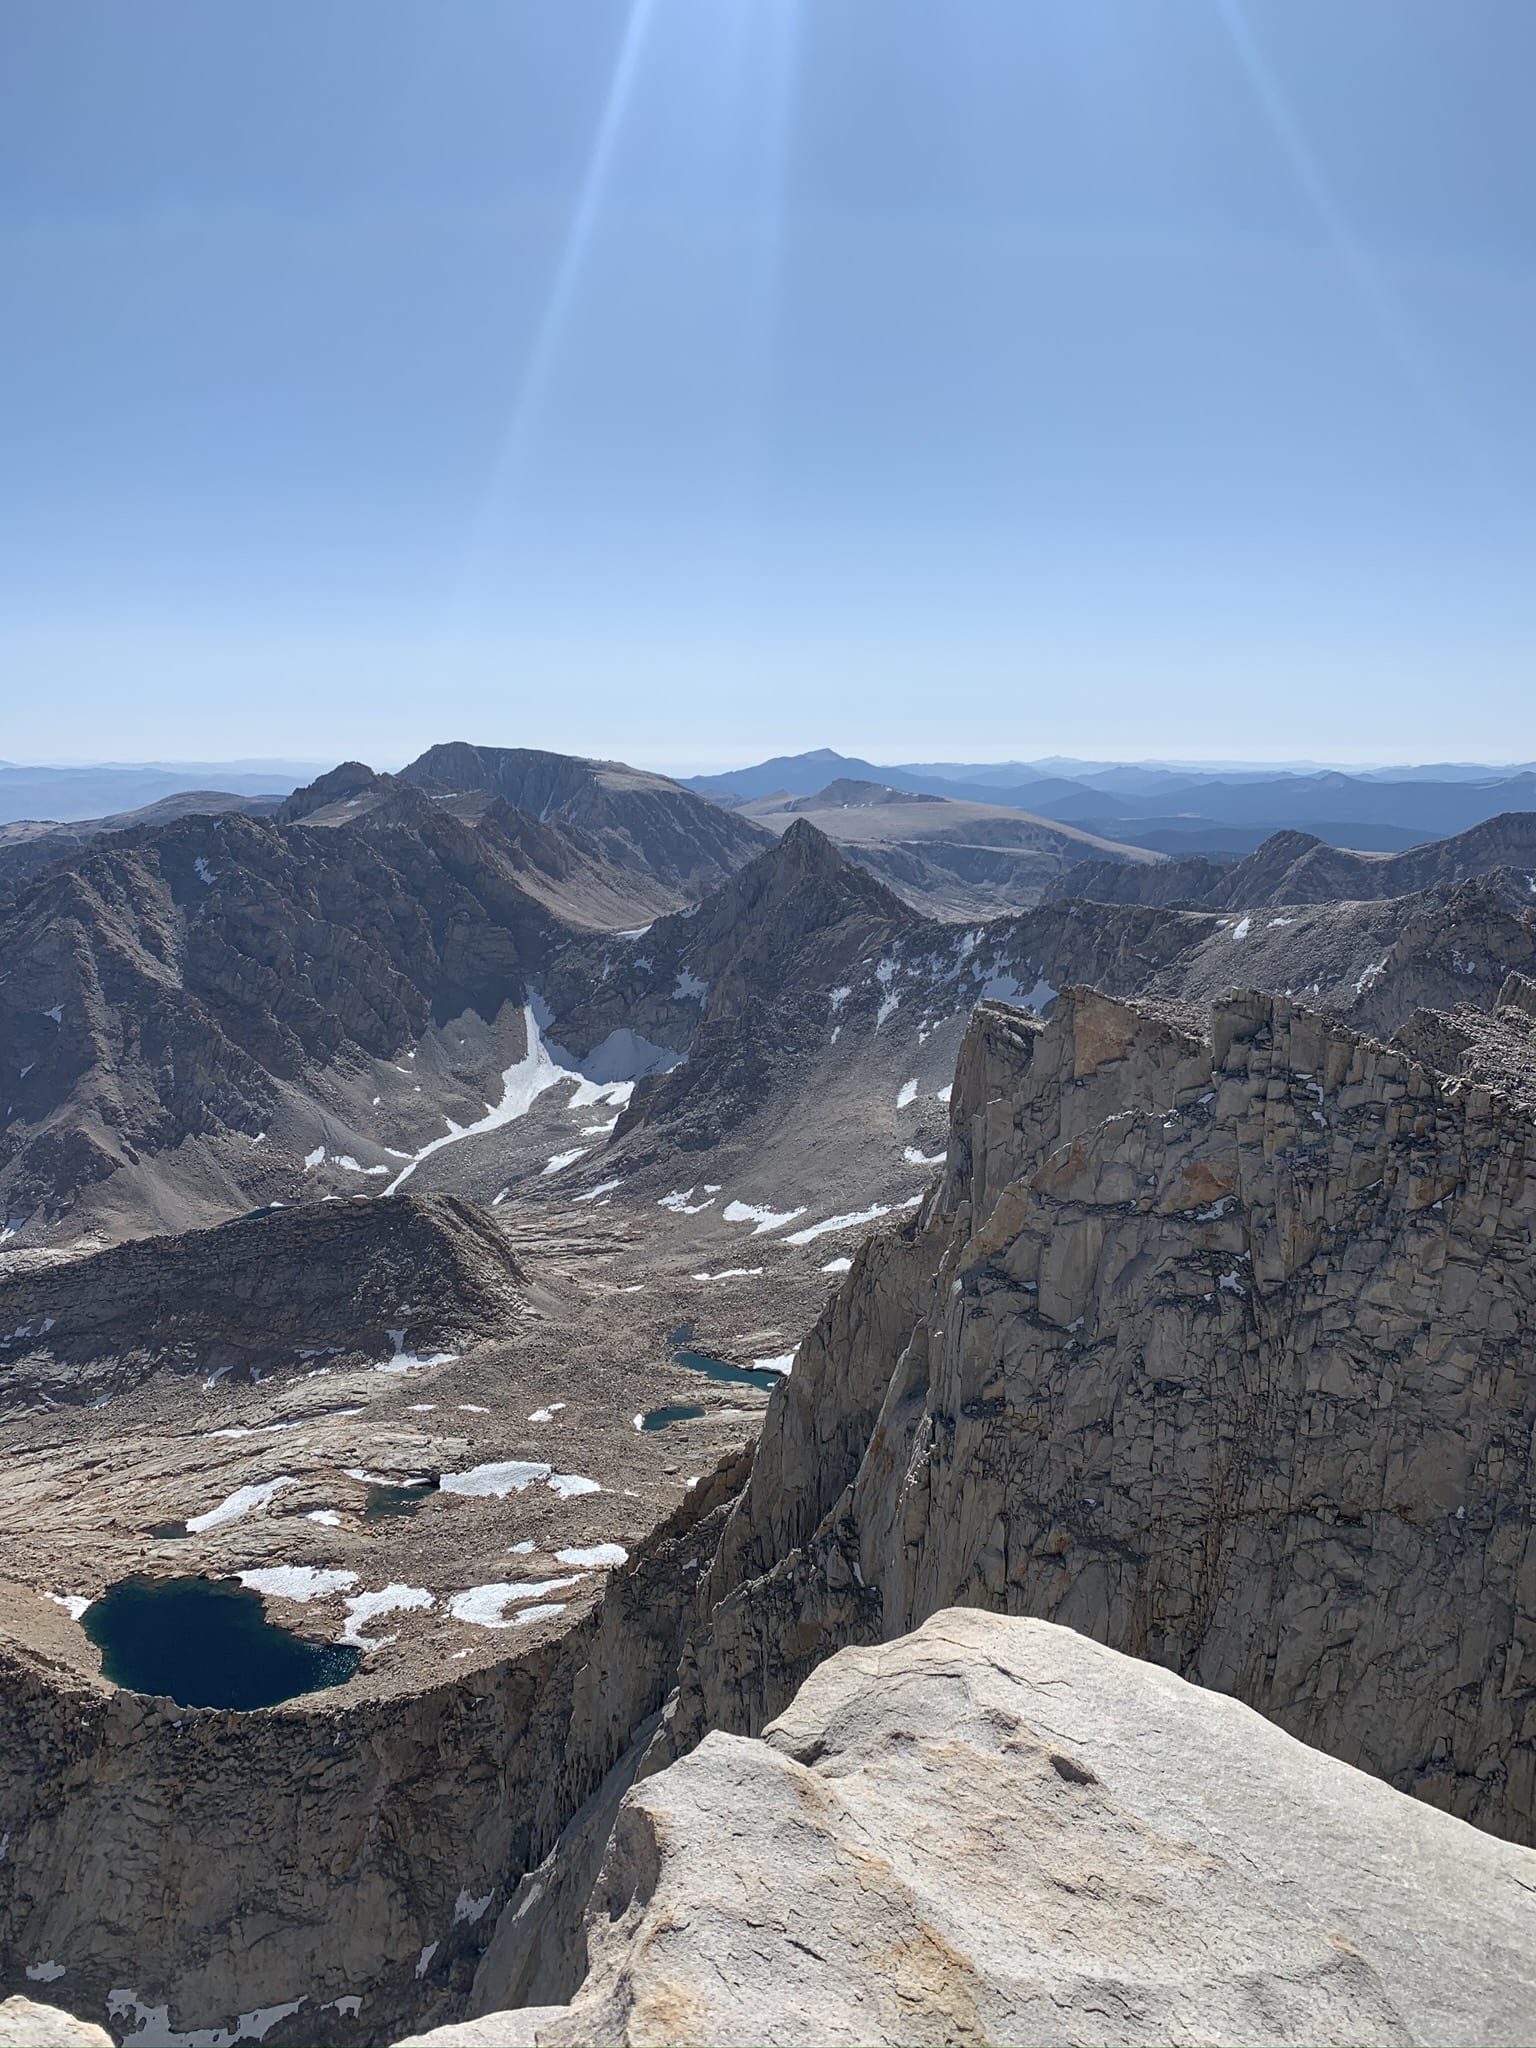
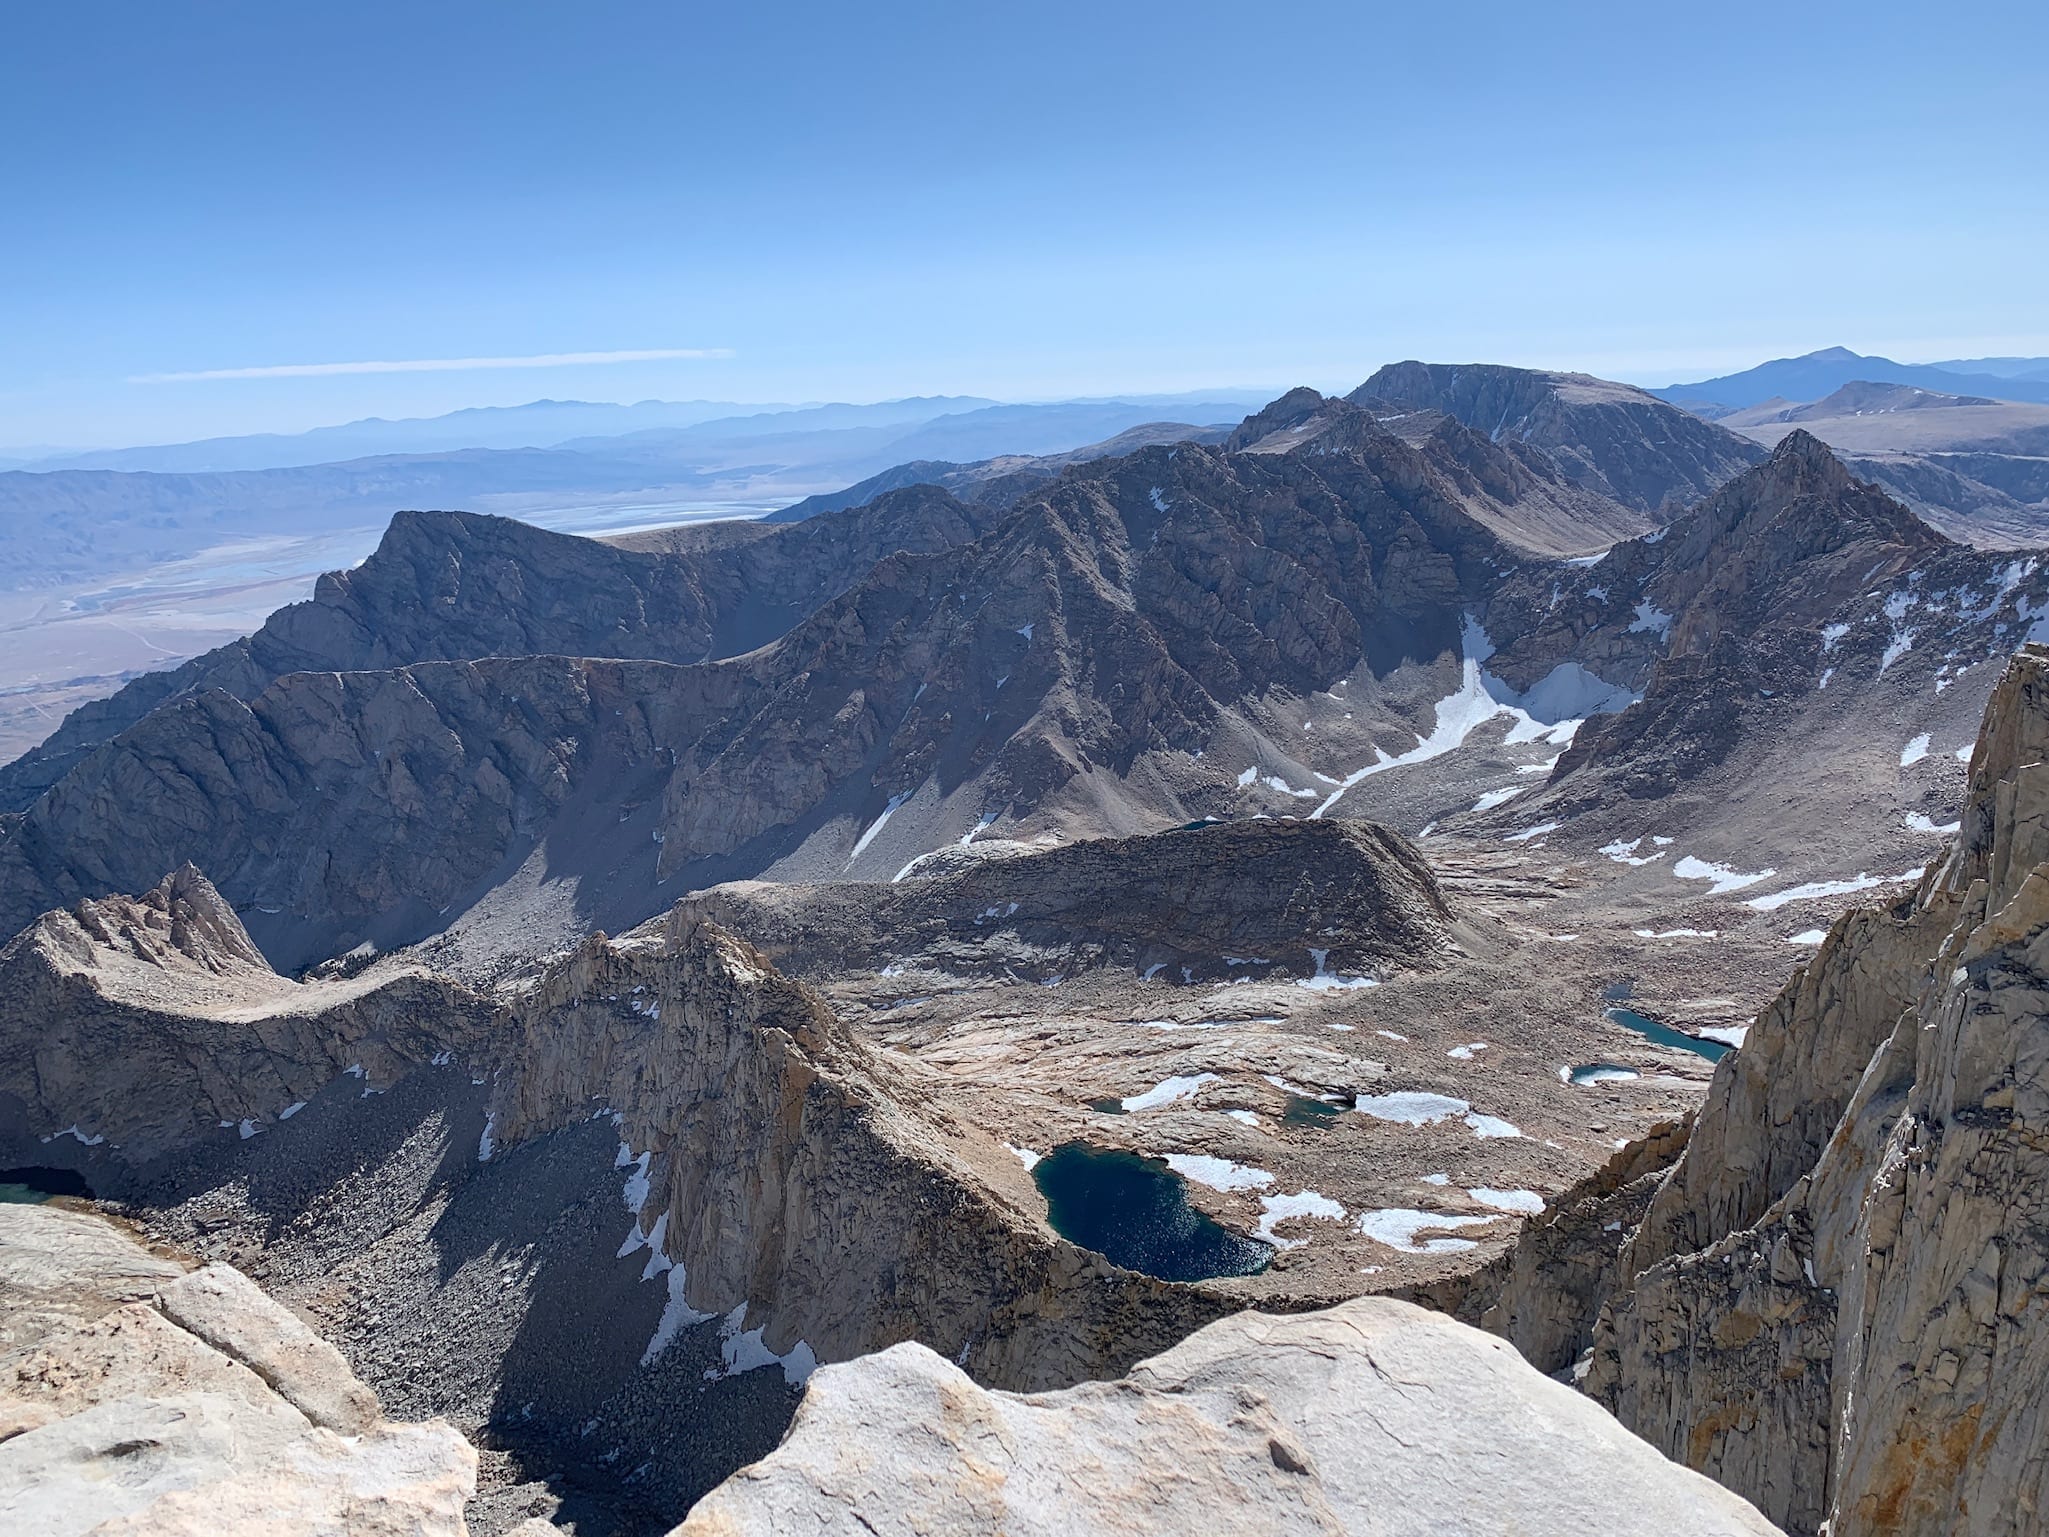
Once the switchbacks are over with, you come around the backside of Mount Whitney. I thought this was the prettiest part of the hike. There were a few interesting parts of the trail, like this narrow snow path below, but the rest of the hike gradually winded uphill. During this section we were hiking particularly slow due to the elevation, stopping very often for water and food.
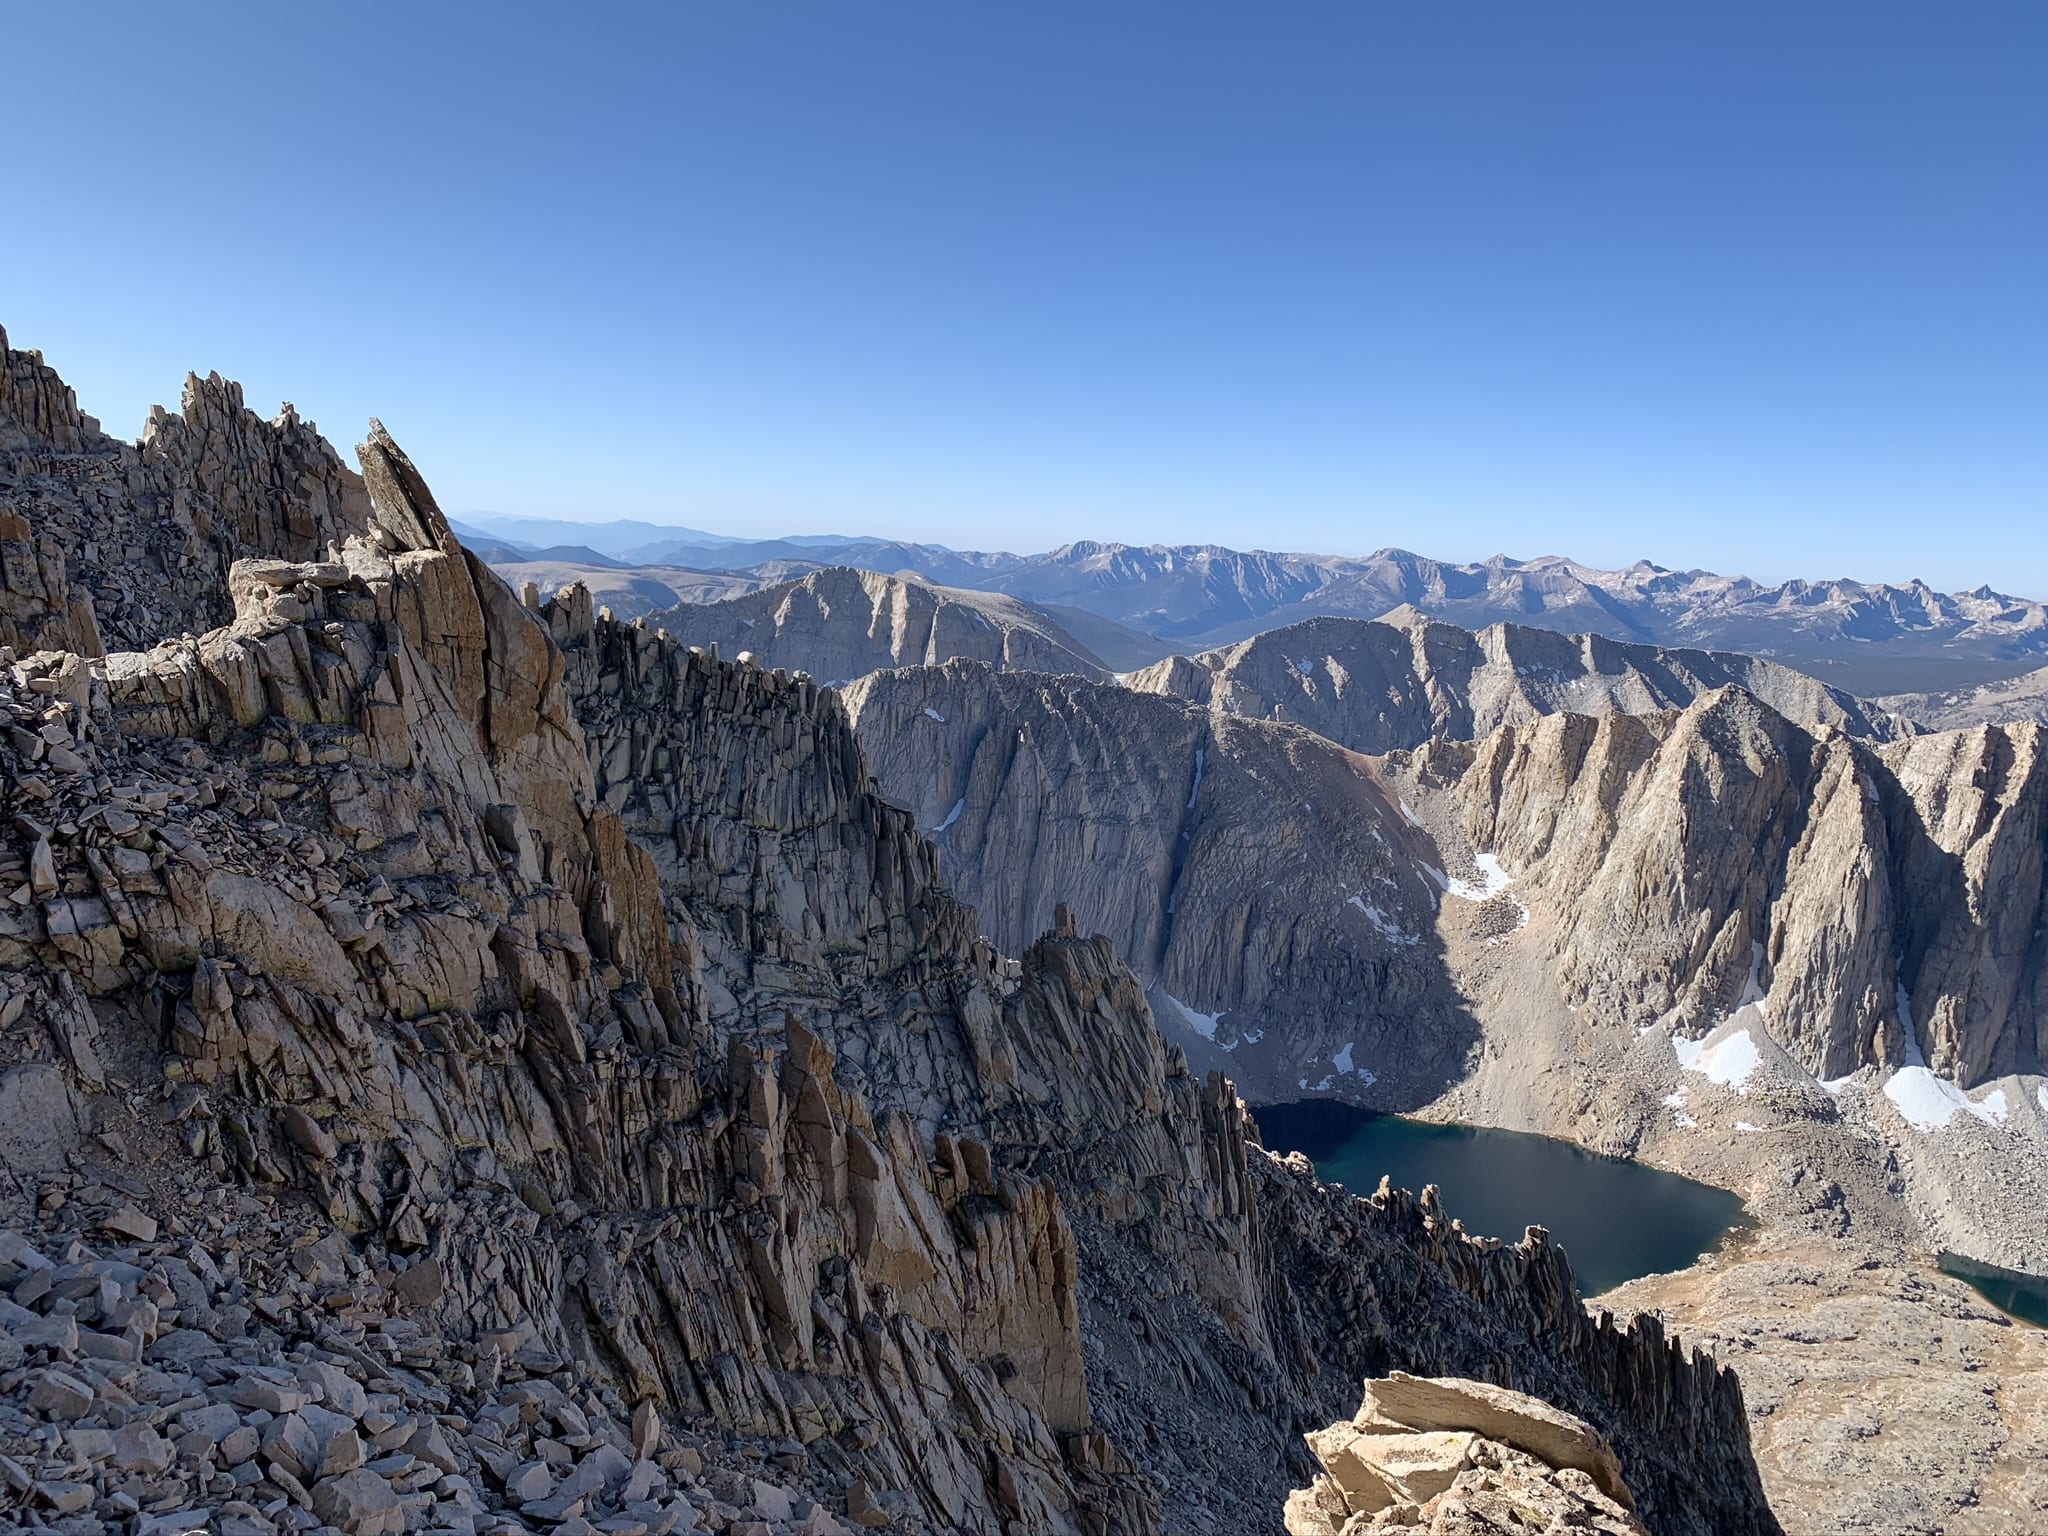
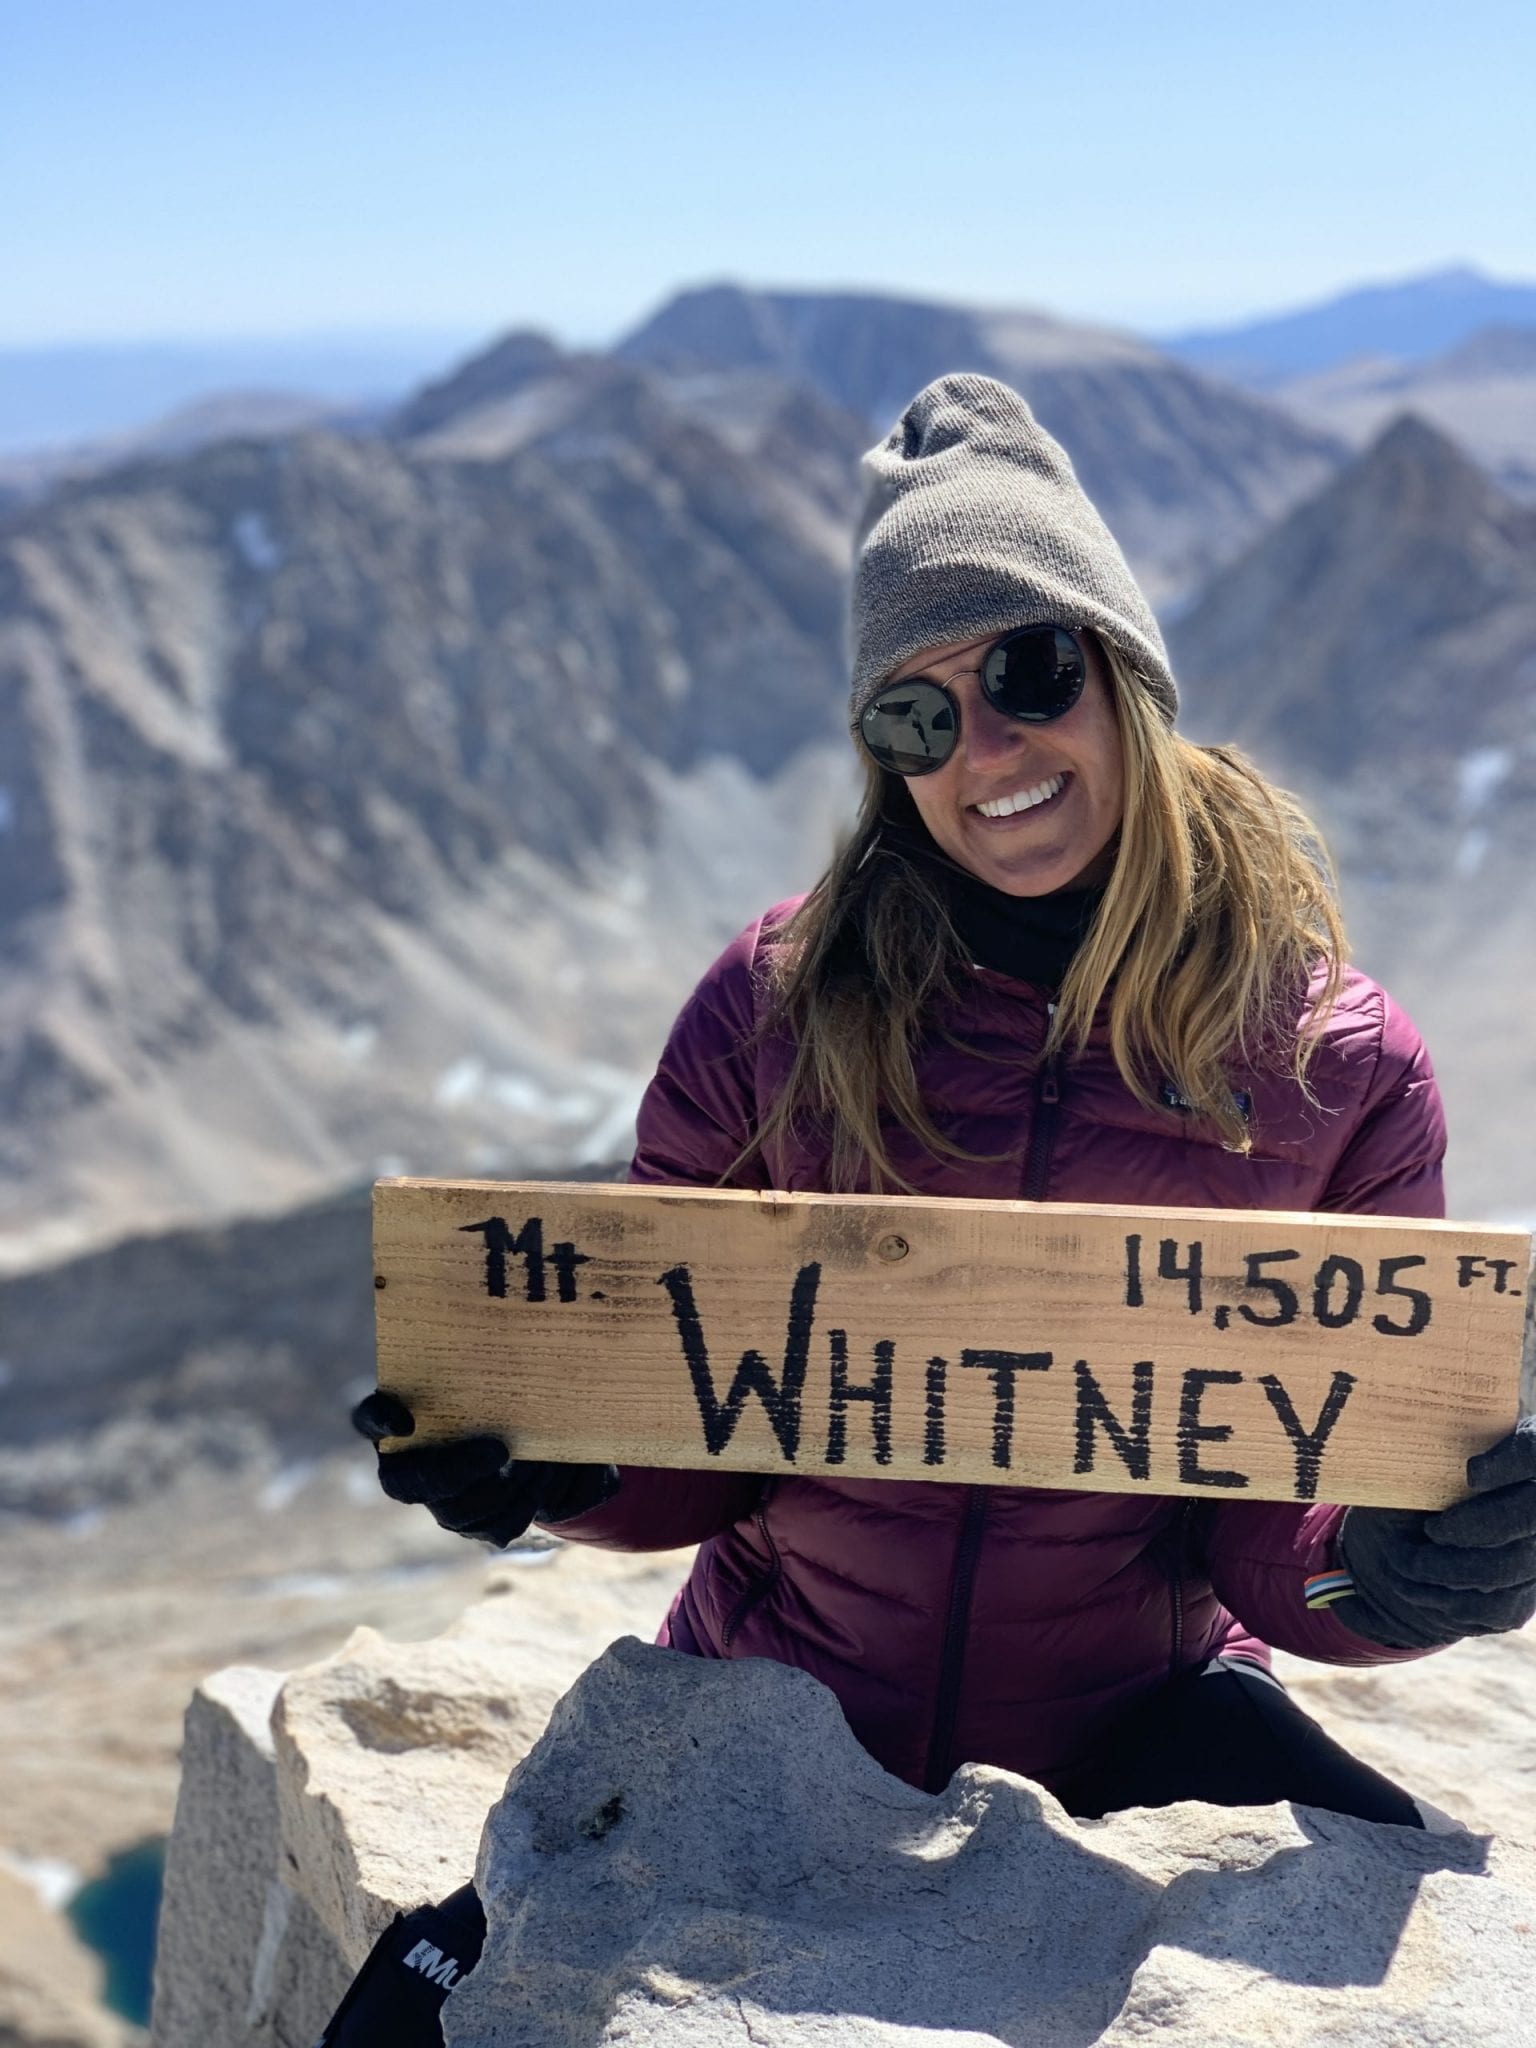
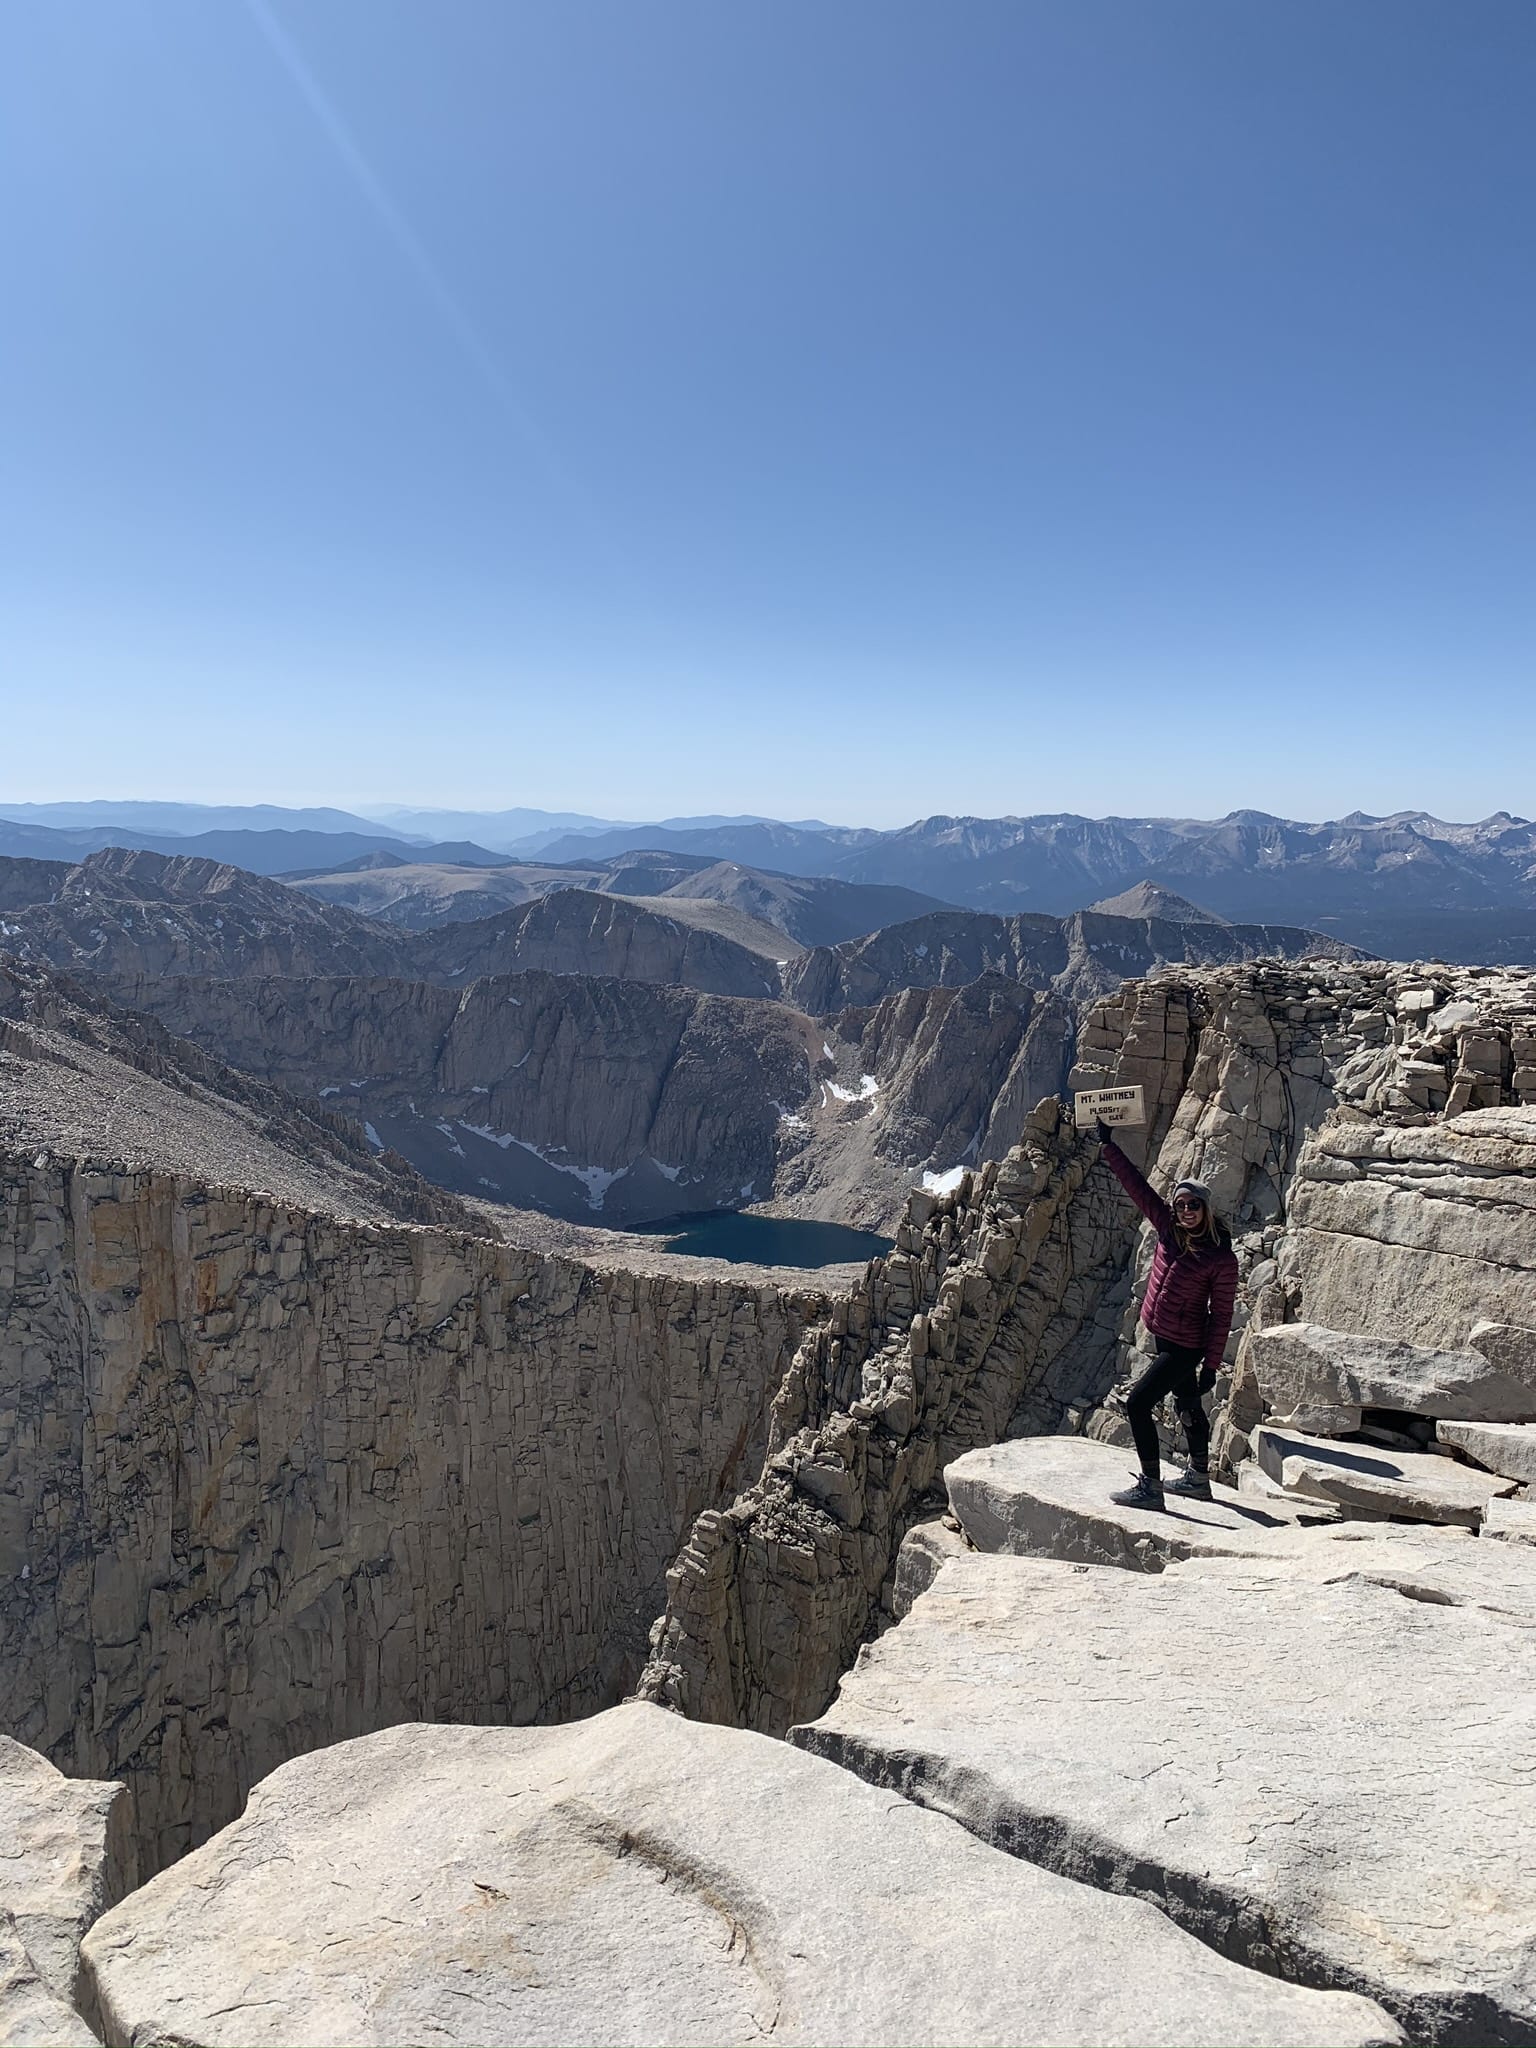
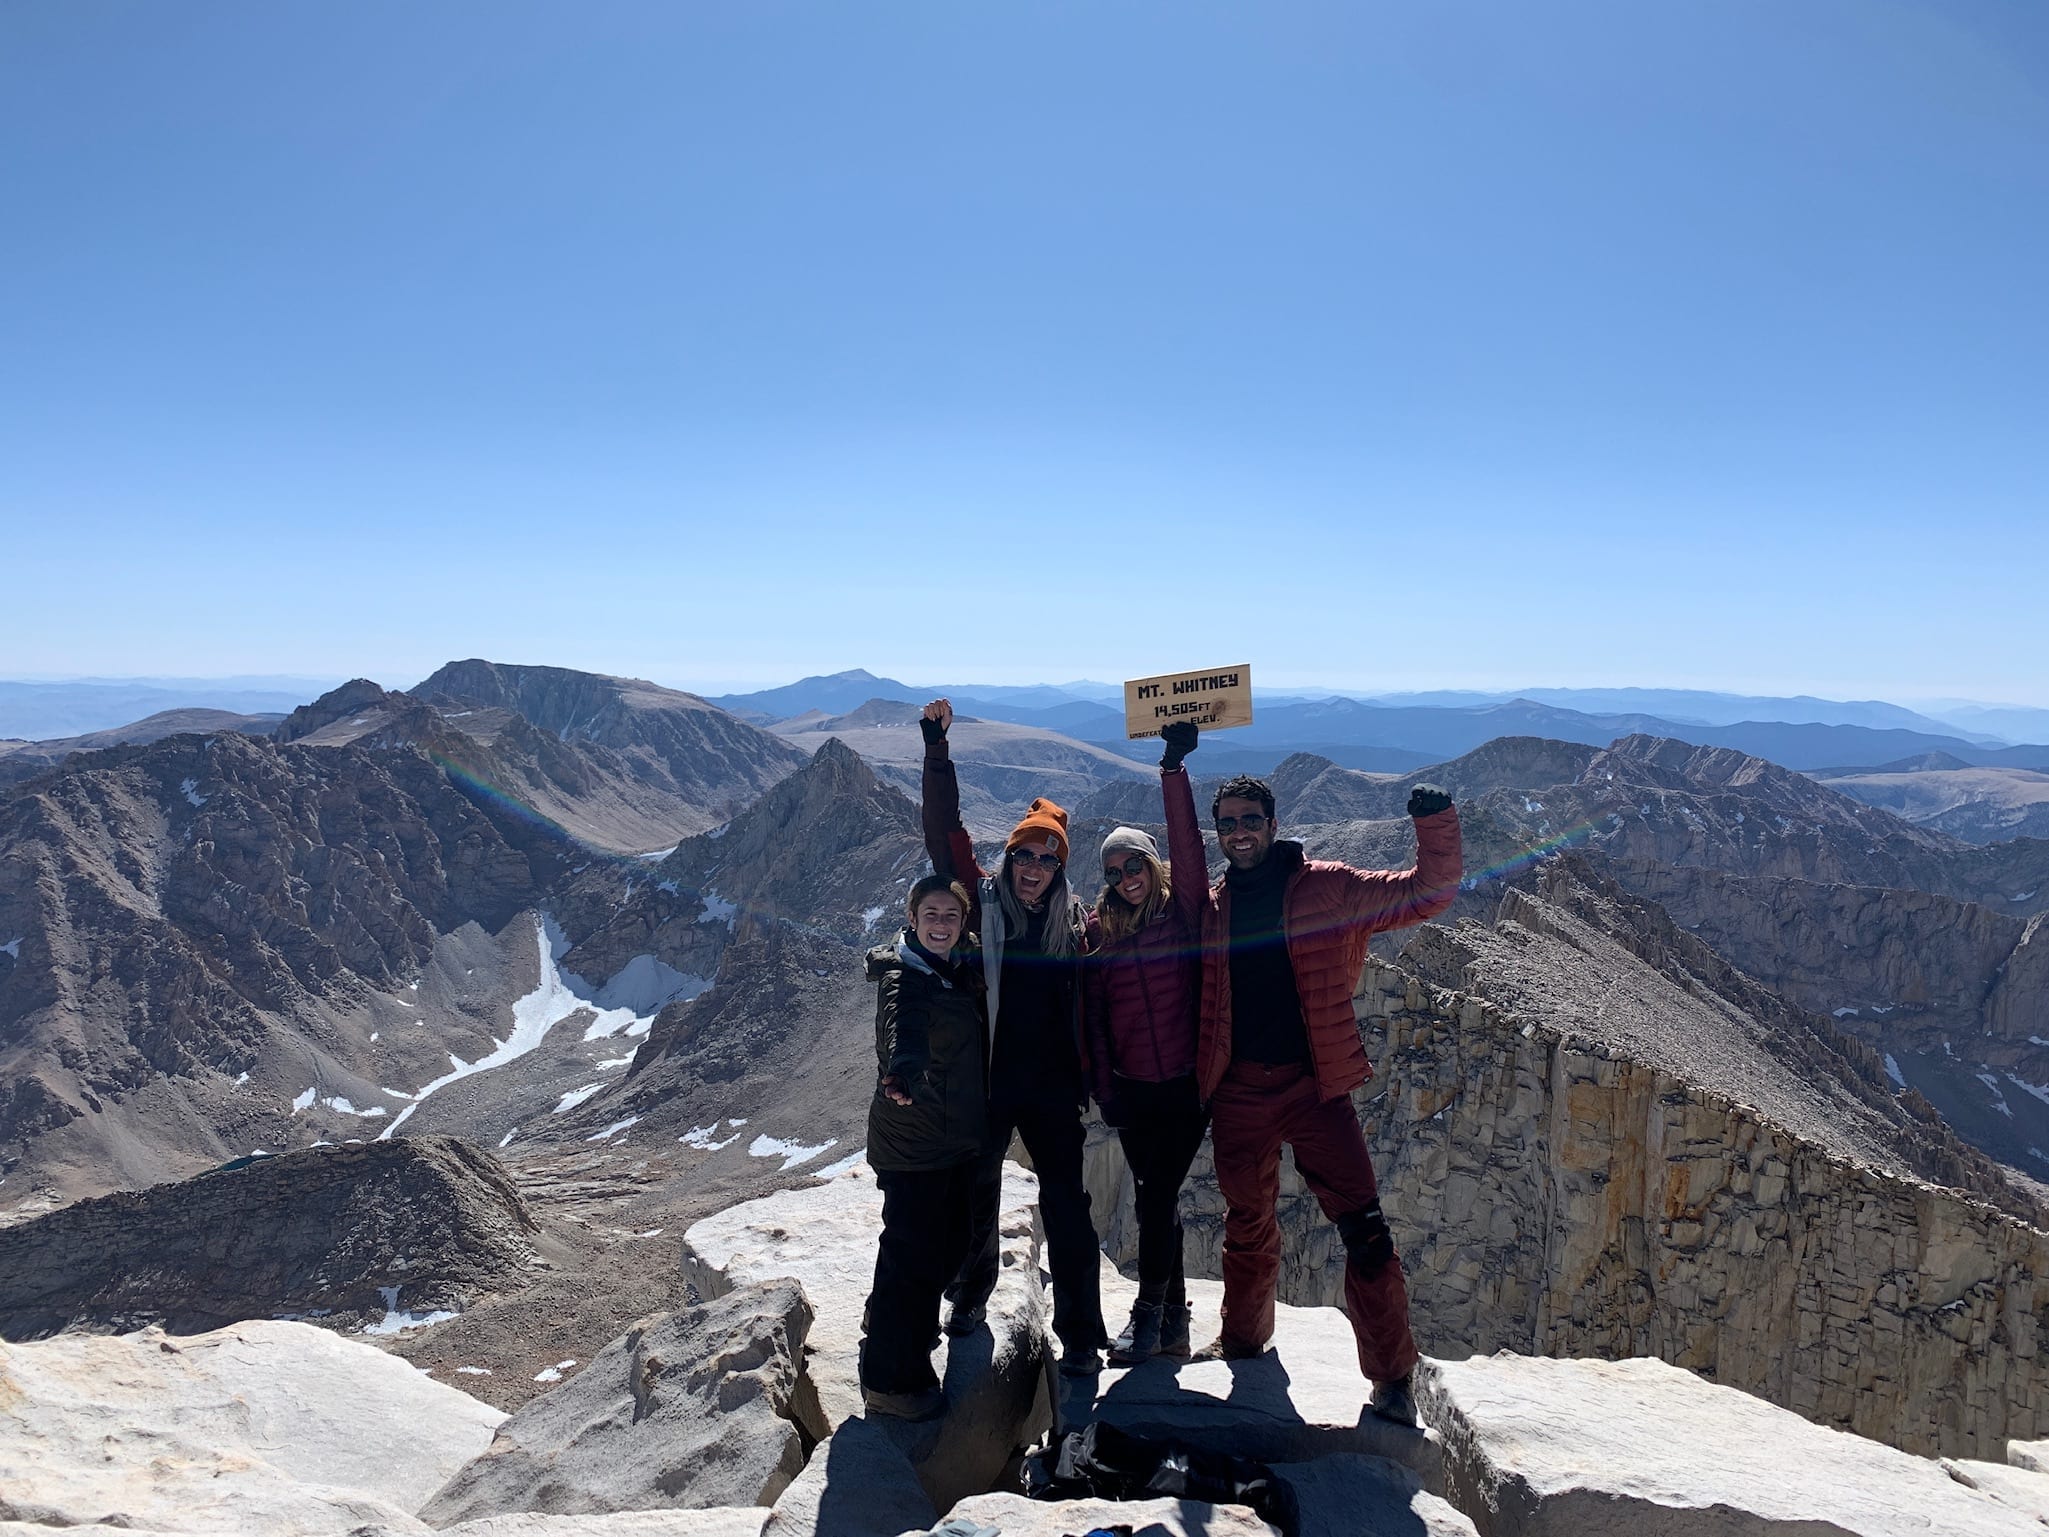
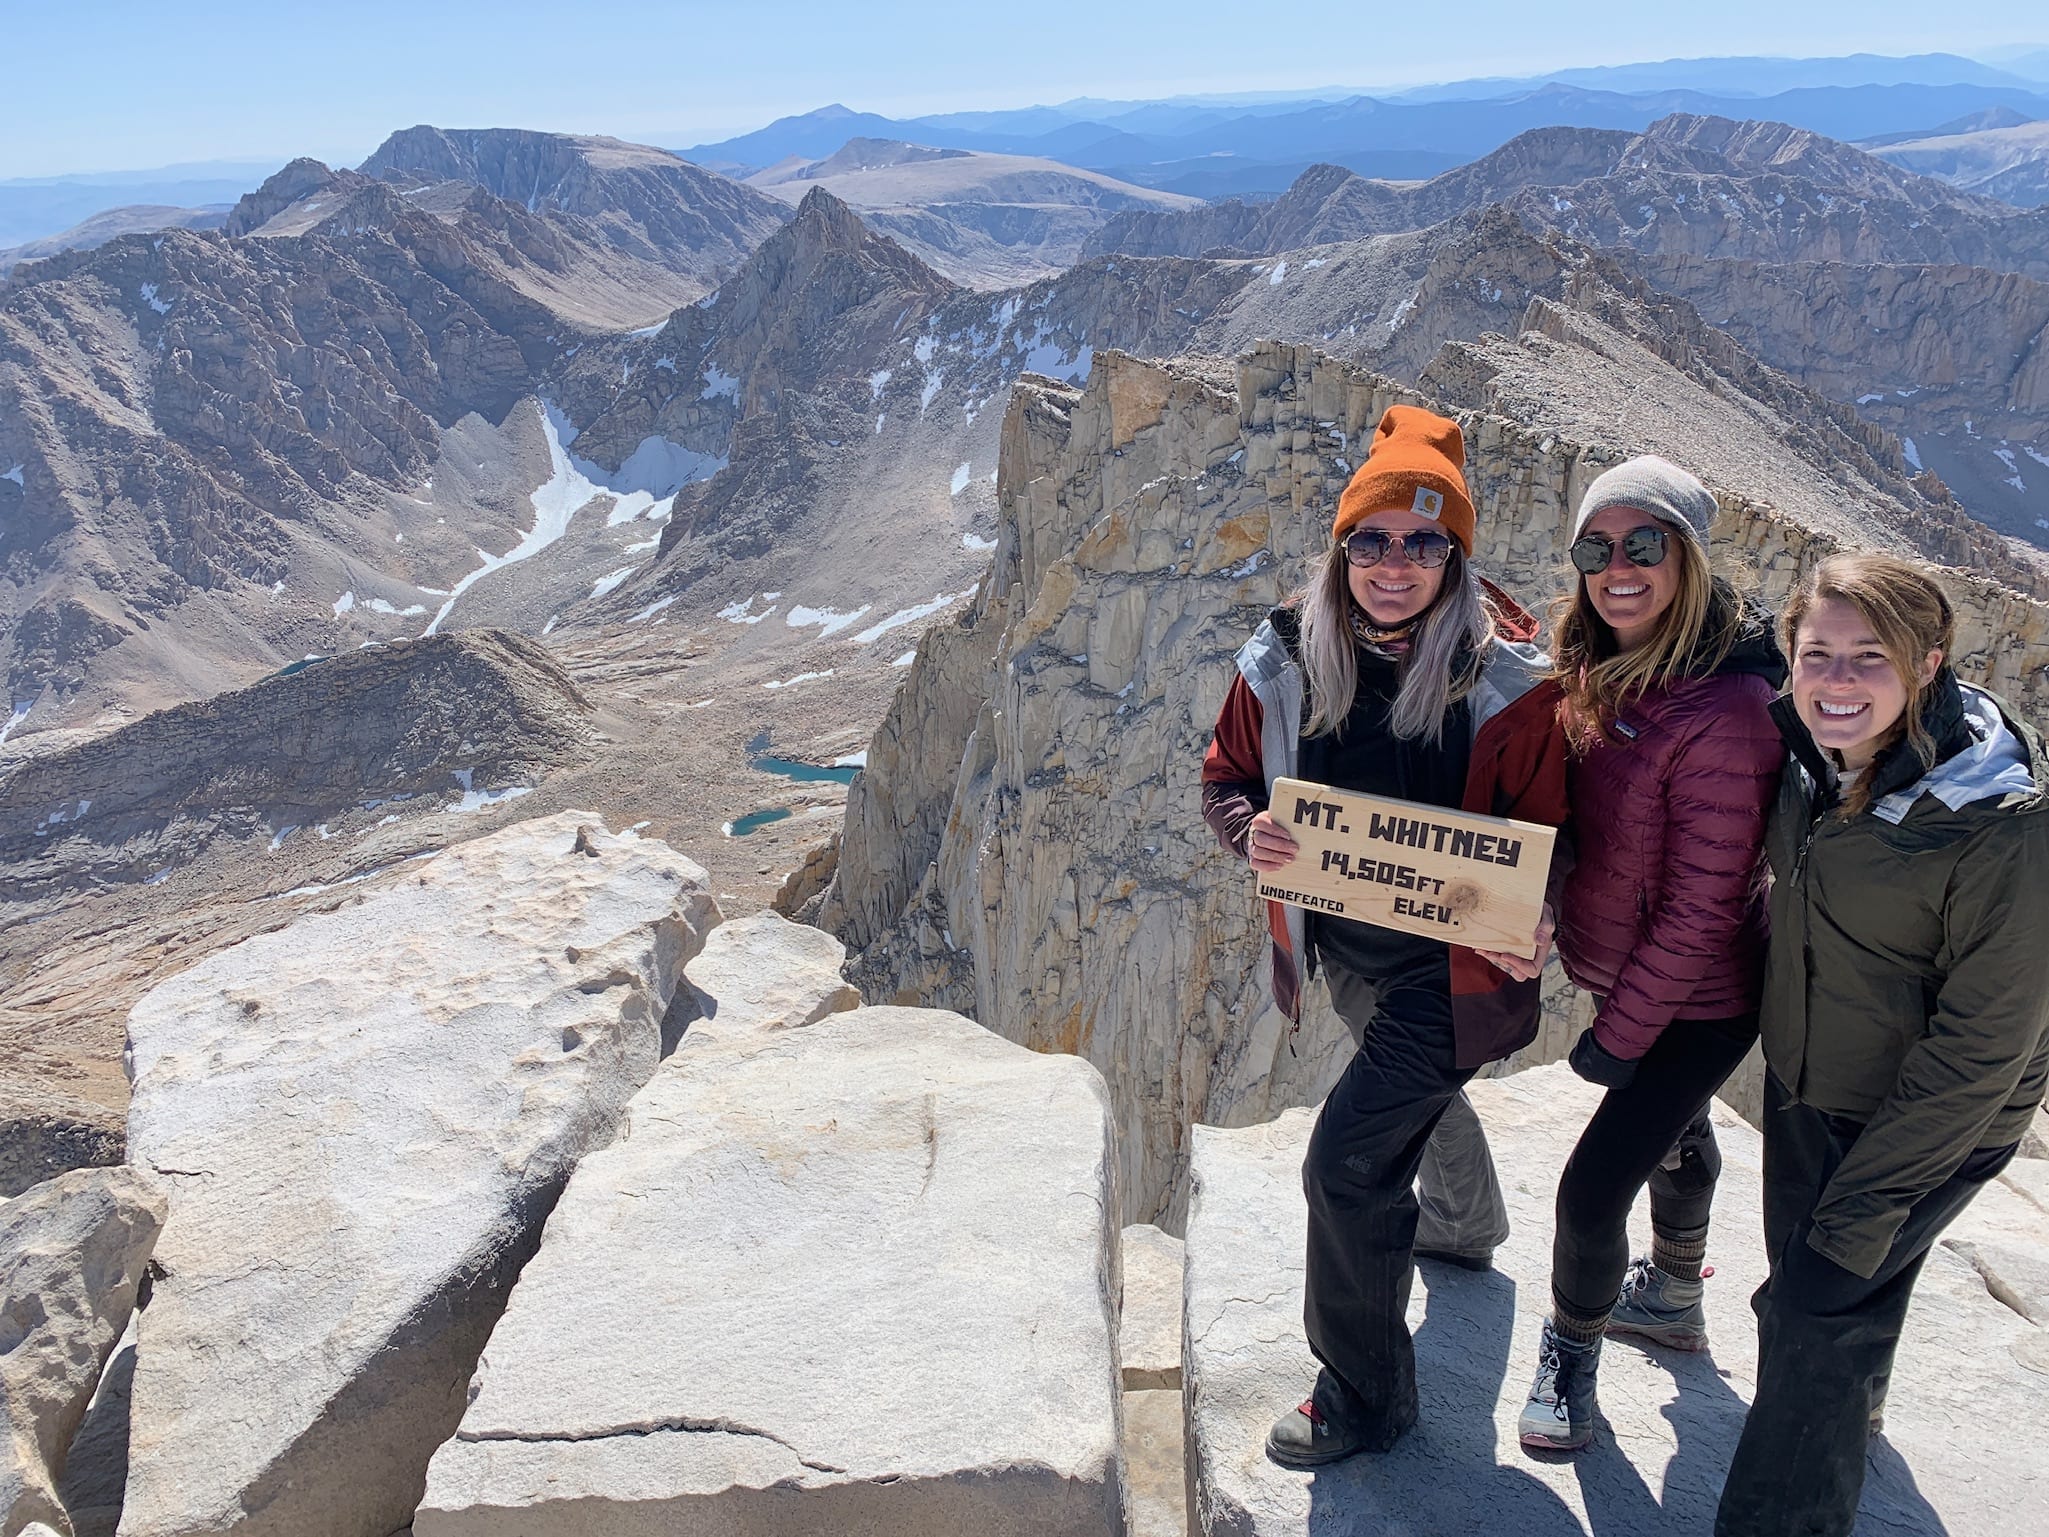
Finally the small shack came in to view and we reached the summit. Despite the freezing cold during the morning, our summit day hiking Mount Whitney ended up being absolutely beautiful. Zero wind at the summit and not a cloud in the sky! I’m not sure how we got so lucky, but I’ll take it!
Someone at the top had a sign that everyone passed around for a picture. We hung out here for a while eating snacks, taking photos, and ultimately delaying our treacherous hike back.
Training for Hiking Mount Whitney
I’d recommend hiking a few 14ers before hiking Mount Whitney if you can. This will help you prepare for the high altitude and show you how your body will react to it. My brother lives in Colorado, so I hiked Grays and Torrey’s Peak and Mount Evans.
If you don’t have access to any 14ers, there are still plenty of other high mountains you can train on. In Southern California, you can hike Mount Baldy, San Jacinto and San Gorgonio.
I was also traveling a ton when I should have been training (remember my 10 day Alaska trip), so followed this training schedule while I was on the road. Now, I’m having flashbacks to me doing squats in our tiny room in Barter Island, while my friend laughed at me for doing plyometrics.
Handling the Altitude on Mount Whitney
Besides doing a few 14ers before hiking Mount Whitney to get your body used to the altitude changes, there are also a few other things you can do. First, make sure to drink a ton of water during the hike, and maybe even add electrolyte tablets in (like these ones). There are also prescription pills you can get for altitude sickness (talk to your doctor). Lastly, make sure to eat every hour, even if you’re not hungry. We actually had a timer that would tell us when another hour would go by so that we would make sure to eat. Snack bars, gels and trail mix are all great snacks eating while hiking.
Gear for Mount Whitney
Osprey Eja I’m in love with this backpack, it’s one of the lightest packs I could find and you can’t go wrong with Osprey
Hiking Boots – I’m obsessed with my Ahnu Sugarpine Boots, there is literally not a comfier hiking boot. I also recently bought these because they’re so aesthetically pleasing, but still wouldn’t choose them over the Sugarpine
Merino Wool Base Layer Leggings
Merino Wool Base Layer Long Sleeve Shirt
Lightweight 2 person backpacking tent
Sleeping Pad – This one is THE BEST
Gloves
Food – We packed pizza in for dinner, fruit, granola bars, trail mix, and energy gels
Hat
Sunscreen
Nuun Electrolyte Tablets (these help fight dehydrationa and also help with the altitude)
Have any questions about hiking Mount Whitney? Feel free to comment below!
Great blog post. Brings back some good memories from when I and some coworkers went up and down but in ONE day. Wish our cameras were better then (late 90s) as we had no celphones and just a disposable camera, so I have no real good pics.
Thanks for the comment Kevin, I always wonder what Mt Whitney was like back in the 90s before social media. That’s bad ass that you did it in one day, was it the regular route or the mountaineering route? I tried the mountaineering route in one day and had to turn around, the altitude difference was making me too slow and we got a little lost on our way up. It’s funny about the photos because I was thinking the same thing about mine. iPhones have gotten a lot better even in the past few years and I see people’s pictures lately and think I wish I had a better camera when I went. I would love to see the old film photos!
Great post, super helpful! My husband, friends and I are going to summit end of September and we are so excited! Reading your post makes me nervous about the cold, hoping it will be a bit warmer since we plan to hike it in 2 days. This time of year, would you still recommend all the cold weather gear? What time of year did you summit? -thanks
Great post on Whitney! This brings back a lot of good memories. We did the two day hike as well and I was able to relive the hike reading your blog! The only thing I don’t miss is the heavy pack on my sore shoulders!
Hi Tosh,
Thanks for reading! Haha the heavy pack is definitely not missed! Would 100% do it again though 🙂
Marteen